
The Easiest Blueberry Cobbler: A Personal Favorite
There are some recipes that instantly bring back memories of warm kitchens, laughter, and the sweet smell of bubbling fruit. This blueberry cobbler with 3 ingredients is exactly that for me. I learned this one from my aunt, who believed dessert should be as joyful to make as it is to eat. It’s the first recipe I ever made with my daughter (she handled the blueberries, I poured in the butter), and we’ve tested it together at least seven times to find just the right ratio for that golden, crisp topping and jammy blueberry base.
Sometimes less is truly more in the kitchen. When I want a comforting, classic dessert without a messy prep or a trip to the store, this cobbler is the one. Whether you’re cooking for a crowd or just want a no-fuss treat, you’ll love how simple and satisfying this bake is.
Why You’ll Love This 3-Ingredient Blueberry Cobbler
- Incredibly easy: You only need three pantry-friendly ingredients and a single dish. No mixing bowls, no complicated steps. In fact, this is my go-to dessert when an unexpected guest drops by or when I need something sweet for a potluck at the last minute—it’s foolproof, even if you’re half-asleep or baking with kids underfoot.
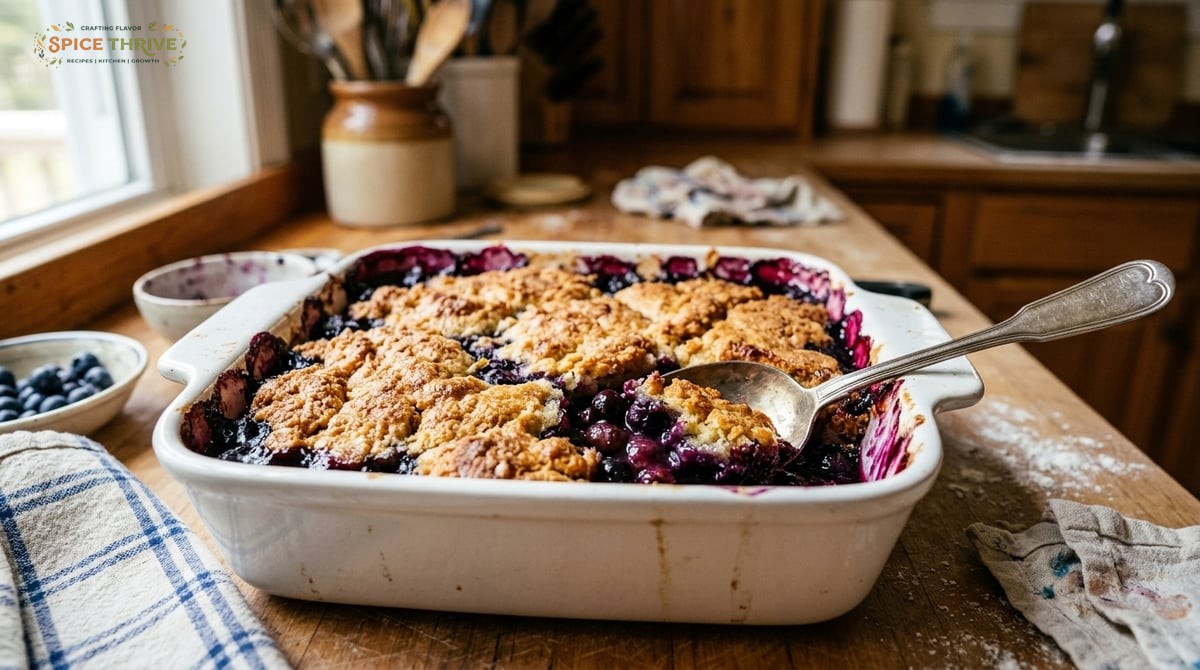
- Rich in flavor and texture: The topping bakes up golden and crispy, while the blueberry filling bubbles and thickens to jammy perfection underneath. You get that homey contrast between the crumbly top and the thick, syrupy fruit layer—as satisfying as a slice of pie, but a fraction of the effort. When served warm, the scent of caramelized cake mix and juicy berries fills the house, making it nearly impossible to wait for it to cool before scooping in.
- Quick prep, quick cleanup: From start to finish, this dessert is ready in under an hour. Cleaning up takes only minutes because there are barely any utensils to wash. All you really need is a baking dish and a spatula. I’ve even assembled it right in a disposable foil tray for backyard barbecues—no cleanup at all, no worrying about getting your casserole dish back.
- Flexible and foolproof: Use fresh or frozen blueberries, play with the ratios, or add upgrades to match your mood. I’ve made this with kids, after long workdays, and for holiday gatherings—it always works. I’ve done this cobbler at summer picnics with underrated wild blueberries, and during winter holidays with frozen fruit pulled from the freezer. You can even stretch a little blueberry bounty by adding a handful of blackberries or raspberries without changing the basic formula.
- Crowd-pleaser for all levels: Whether you’re a beginner or a seasoned baker, this cobbler is trustworthy. It’s especially fun to make with little helpers, since there’s no need for precision or special equipment. Older kids love helping scatter the cake mix or drizzle butter, and it’s forgiving enough to let them take charge without stress. Guests always ask for the “secret” recipe because of how flavorful it is, never guessing how quick it is to make.
- Customizable for every season and event: This is the sort of bake you can dress up or down—serve it family-style straight from the dish at a picnic, or scooped into ramekins with a scoop of vanilla ice cream for a dinner party. Try swapping in seasonal fruit blends (like blueberries and peaches in late summer), or make individual cobblers in muffin tins for grab-and-go treats at potlucks. The basic method stays the same every time.
Just 3 Ingredients: The Core of This Blueberry Cobbler
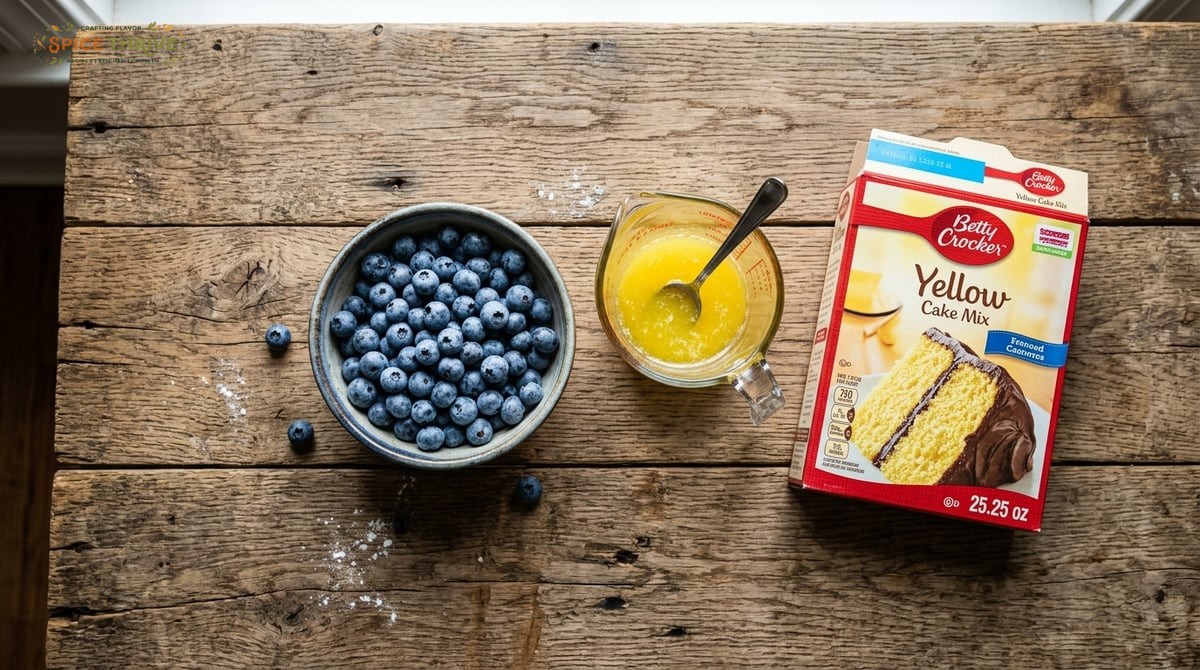
Here’s what you’ll need, plus how each one makes this cobbler so satisfying:
- Blueberries (6 cups/750g): The star. Fresh or frozen work here—just scatter straight into your baking dish. If using frozen, don’t thaw, but know your filling will be juicier. Choose the sweetest, plumpest berries for the brightest flavor. I’ll admit: I’ve used wild blueberries, grocery store pints, and even that bag I forgot in the freezer—all worked beautifully. When I have access to farmers’ market blueberries, the flavor really shines, but this cobbler is designed to make even average berries taste like summer. If your blueberries tend to be tart, a sprinkle of sugar right on top before baking offsets that.
- Yellow cake mix (1 box/425g): The game-changer. Cake mix becomes a crisp, almost biscuit-like topping as it bakes. Use classic yellow, but white, vanilla, or even lemon cake mix work for fun twists. For a gluten-free option, just swap in a gluten-free cake mix of similar weight. The beauty of cake mix is the built-in leavening and flavor; it delivers that crumbly cobbler topping with zero fuss. You can experiment with seasonal mixes too—lemon for a bright spring touch or spice cake for cozy autumn flavor. Some bakers even add a spoonful of extra cinnamon or nutmeg right to the dry mix for subtle warmth.
- Unsalted butter (1 cup/225g): Melted and poured over the cake mix. The butter soaks down, turning the powder into a golden, textured crust with crisp bites on top and chewy, soft crumbles underneath. For a dairy-free version, vegan butter or coconut oil works. Make sure your butter is truly melted for even coverage—a tip I learned after a couple early cobblers sported a few unmelted patches. And if you want to cut back a bit, just use 3/4 cup; your topping will be a little less rich but still plenty satisfying.
Optional upgrades: A sprinkle of lemon zest, a pinch of cinnamon, or a handful of chopped nuts can take this cobbler to the next level, but it shines perfectly as-is. For gatherings, I sometimes stir in a teaspoon of vanilla extract with the melted butter, or scatter sliced almonds over the top before baking for bonus crunch. If you like a bit of tartness, fresh lemon zest right over the berries before baking amplifies both the freshness and aroma of the fruit base.
Step-By-Step: Making 3-Ingredient Blueberry Cobbler
- Heat your oven and prep: Preheat to 350°F (175°C). Lightly butter a 9×13 inch (23×33 cm) baking dish for easy serving and clean release. I always test with both metal and ceramic—ceramic gives the best slow, even bake for bubbling berries. If you’re halving the recipe, an 8×8 inch (20×20 cm) square dish works perfectly and results in slightly thicker layers of fruit and crisp. Make sure the dish is deep enough; you don’t want bubbling berry juice to spill over in the oven.
- Layer the blueberries: Pour 6 cups (750g) blueberries evenly into the dish. They should just cover the bottom. If your berries are tart, sprinkle with 2 tablespoons (25g) extra sugar. I learned this the hard way with a batch of underripe berries—taste your fruit and trust your instincts. If adding a bit of lemon zest or a splash of vanilla, mix it into the berries now for the most impact. This is also the moment to sprinkle a tablespoon of cornstarch over frozen berries, which helps thicken extra juices as it bakes.
- Add the cake mix: Sprinkle the cake mix (1 box/425g) evenly over the berries. Don’t press it down. Leave it a bit loose so butter can sink through, making little craggly bits. Aim for an even blanket, but don’t stress over perfection—this dessert’s rustic nature is what makes it beautiful. If you’re adding cinnamon or spices, sprinkle them onto the cake mix before adding butter.
- Drizzle with melted butter: Melt 1 cup (225g) butter and pour slowly over the cake mix, covering as much as possible. Some dry spots are fine—you’ll get extra crispy topping there. Pouring more slowly and methodically helps the butter penetrate down into the mix. If your butter pools too much in one spot, use the back of a spoon to gently encourage even distribution, but avoid actually stirring.
- Bake: Place in the oven and bake 40–50 minutes. The topping should be golden brown and the berries should be very bubbly around the edges. Let cool 10–15 minutes. The hardest part is waiting, but the juices thicken as it sits. I recommend checking at 40 minutes; your oven and the juiciness of your berries determine the final time. The aroma is your first clue that it’s almost ready—the kitchen will start to smell like sweet vanilla cake and warm jam. Look for those telltale bubbling edges and dry golden patches on top.
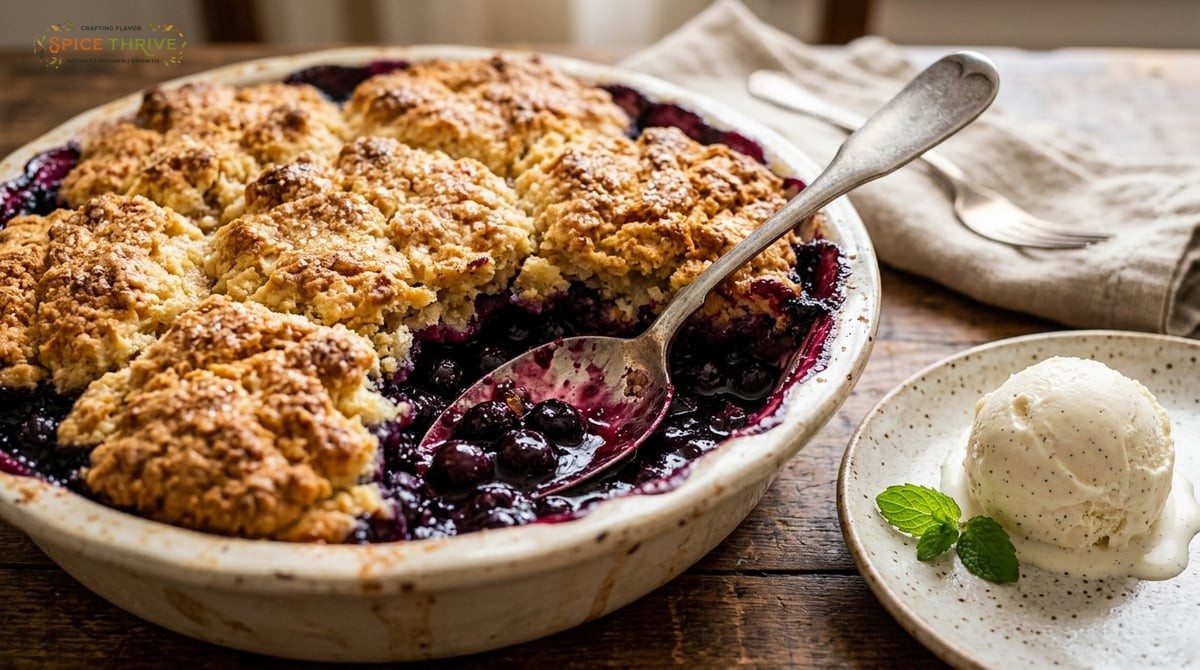
- Serve: Spoon cobbler into bowls, making sure everyone gets some crisp topping and berry syrup. Best warm, but delicious at room temp too. At home, I serve it family-style, letting everyone dig in. For parties, you can scoop it into short, clear glasses for a pretty layered look with vanilla ice cream or fresh whipped cream on top. Leftovers are fantastic the next morning as a decadent breakfast with Greek yogurt.
Troubleshooting and Pro Tips from My Kitchen Tests
- Don’t over-mix: The key is a loose cake mix layer. If you stir or pat it down, you risk a dense, stodgy top. Let the butter work its magic instead. Trust that gravity and melting butter will create the just-right texture—this step is often where new bakers overthink it.
- Watch the butter coverage: It’s fine if a few dry patches remain. They become the crunchiest bits. If you want a more even crust, use a spoon to gently tap down the cake mix after pouring butter. When I first tested, I tried to cover every inch with butter, but now I aim for a natural, uneven drizzle. The result is an even mix of crispy and chewy morsels on top—exactly what a cobbler should be.
- Adjust for juicy berries: If using very ripe or frozen berries, add a tablespoon (8g) of cornstarch to catch excess liquid. The first time I skipped this, the cobbler was a bit soupy—but still delicious with ice cream. This quick fix works especially well if your frozen berries are packed with ice crystals or if you prefer a firmer base to your cobbler. Just sprinkle cornstarch over the berries before adding the cake mix.
- Test doneness by color and bubbling: Don’t pull it too early. You want the top golden and dry, and the edges actively bubbling with berry syrup. A glass baking dish lets you check the juices (they’ll look thick, not watery, as the cobbler finishes). If in doubt, give it five extra minutes for a perfectly set topping and syrupy berries below.
- Let it rest: Just 10–15 minutes of cooling gives you a thicker filling and easier scooping. I usually sneak a crispy edge while it cools as a baker’s reward. Serving too soon can mean runnier filling, but that’s nothing a scoop of ice cream can’t fix.
- Bonus tip—double batches for a crowd: For parties, I sometimes double the recipe in two pans and bake side-by-side; the second batch never goes to waste, and it freezes beautifully. If making for a large group or for meal trains, offer half with nuts or extra citrus and the other half plain. The simplicity of assembly means doubling takes only an extra minute or two.
Every time I test, I focus on balance: golden-crisp on top, jammy berries below. My best result came from carefully drizzling butter and using a glass baking dish for even heat. If you’re looking for a little twist, swap the butter for browned butter—it adds a nutty depth and a gourmet finish with just a little more effort (simply melt butter until it smells toasty and golden before drizzling).
Variations and Dietary Swaps
- Gluten free: Swap regular cake mix for a gluten-free blend. I’ve tested King Arthur and Betty Crocker—both worked great, though the topping was slightly more delicate. Another tip: if your gluten-free cake mix is bland, a tiny pinch of salt or extra vanilla can make up for flavor lost to alternative flours. Guests with celiac or gluten sensitivities rarely notice the difference.
- Dairy free/vegan: Use vegan butter or coconut oil in place of dairy butter. The texture is just as golden and crisp, with a hint of coconut if you use the oil. I like Earth Balance for buttery flavor, while coconut oil adds subtle tropical notes that pair nicely with blueberries. I’ve brought vegan versions to family events and, to my surprise, they often disappear first.
- Other fruits: This method works with sliced peaches, blackberries, strawberries, cherries, or mixed berries (totaling 6 cups/750g). Adjust sugar if needed, since some fruits are tarter. In late summer, a half-and-half blend of blueberries and peaches is a highlight—each fruit’s juices mingle and create a two-tone filling beneath the golden, crumbly topping. Blackberries bring a wild flavor and slightly more tang, so a bit of sugar or honey on top brings out their best. You’ll find endless possibilities with whatever’s in season or in your freezer; I’ve even made this with lingonberries and a dash of orange zest for a Scandinavian twist.
- Upgrading the flavor: Add a teaspoon of cinnamon to the cake mix, or a tablespoon of fresh lemon zest over the berries, for extra depth. Chopped pecans or walnuts added to the topping are delicious too. Some bakers like to swirl raspberry jam through the berries or add dark chocolate chips over the topping before baking for “fancy” versions. The possibilities are limited only by your imagination (and what’s in your pantry).
- Presentation tips: For dessert buffets, serve the cobbler in individual ramekins or short mason jars layered with whipped cream or vanilla yogurt. Top with a few fresh blueberries for a pretty finish. Alternatively, use mini muffin tins for bite-size portions at big gatherings. Each portion gets a perfect balance of crisp and berry, and clean-up is even easier.
This cobbler invites you to experiment—swap the cake mix flavor, add your favorite spices, or make it with whatever fruit is in season. Each version is a new delight. Even after making it dozens of ways, I still look forward to trying a new twist every summer or for cozy holiday gatherings.
Storage, Reheating, and Make Ahead Tips
- Storing: Keep leftover cobbler covered in the fridge for up to 4 days. The topping stays crisper if you leave it uncovered the first night. If your house is particularly humid, a loose tent of foil helps preserve texture while keeping out fridge odors.
- Reheating: Warm individual servings in the microwave for 30–45 seconds, or reheat the whole dish in a 325°F (160°C) oven for 10–15 minutes. The top crisps up again if you cover loosely with foil and uncover for the last few minutes. On lazy mornings, I’ll even toast cold cobbler squares in a toaster oven to reboot the crisp topping. Serve with coffee or tea for a breakfast treat that rivals any pastry.
- Freezing: Blueberry cobbler freezes well, baked or unbaked. Cool completely, then wrap in plastic and foil. Freeze up to 2 months. Thaw in the fridge, then reheat before serving. Single servings can be frozen in small containers for portioned treats—perfect for lunchboxes or quick snacks after school. The topping softens a little after freezing, but a few minutes under the broiler saves the day, restoring its crispiness.
- Make ahead: Assemble the dish, cover, and chill up to 24 hours before baking. If baking cold from the fridge, add an extra 5–10 minutes and watch for bubbling edges. This is ideal for holidays or dinner parties—do all the prep work the night before and enjoy dessert fresh and hot with zero fuss after the main event. Friends report success with prepping cobbler for camping trips, baking in foil on a grill until golden and bubbly (a fun twist for outdoor summers).
This simple cobbler is made for sharing—and enjoying over a few days if you’re lucky enough to have leftovers. I like mine straight from the fridge on summer mornings, with a spoonful of Greek yogurt.
Printable 3-Ingredient Blueberry Cobbler Recipe
Prep Time: 10 minutes
Cook Time: 45 minutes
Total Time: 55 minutes
Yield: 8 servings
Ingredients
- 6 cups (750g) fresh or frozen blueberries
- 1 box (425g) yellow cake mix
- 1 cup (225g) unsalted butter, melted
Instructions
- Preheat oven to 350°F (175°C). Grease a 9×13 inch (23×33 cm) baking dish.
- Spread blueberries evenly in the dish. If desired, toss with 2 tablespoons (25g) sugar for tart berries.
- Sprinkle cake mix over the berries in an even layer. Do not mix.
- Drizzle melted butter across the cake mix, covering as much as possible.
- Bake 40–50 minutes, until the top is golden and the berries are bubbling.
- Cool 10–15 minutes before serving. Enjoy warm or at room temperature.
Nutrition Estimate (per serving)
- Calories: 340
- Fat: 17g
- Carbs: 47g
- Protein: 2g
Allergen Notes
Contains wheat (gluten) and dairy. For gluten free, use GF cake mix. For dairy free/vegan, use plant-based butter.
Ready to Bake? Share Your Results!
That’s my go-to for effortless blueberry cobbler with 3 ingredients—tested, photographed, and enjoyed many times in my own kitchen. If you give it a try, let me know in the comments how it turned out, or tag @spicethrive on social with your results. For more comforting bakes and global recipes, visit our About page or browse dessert ideas here. The best desserts are the ones you share—happy baking!
Recipe retested and updated June 2024.
Common Questions
Can I use frozen blueberries?
Absolutely. You don’t need to thaw them—just add a few extra minutes to the bake time if needed, and expect a juicier filling.
Can I use other types of cake mix?
Yes! White, lemon, or even spice cake mixes all work well. Choose your favorite for a twist.
How do I know when the cobbler is done?
The topping will be golden and dry to the touch, and the blueberry filling will bubble around the edges.
Can I halve the recipe?
Yes, simply use a smaller (8×8 inch) dish and cut all ingredients in half. Check five minutes early while baking.
Can I make this in advance for a party?
Definitely. Assemble and store in the fridge for up to 24 hours, then bake just before serving.
How do I serve it?
It’s fantastic on its own or with a scoop of vanilla ice cream, whipped cream, or a dollop of yogurt.
This article was created with the help of AI. Images may also be AI-generated.

