
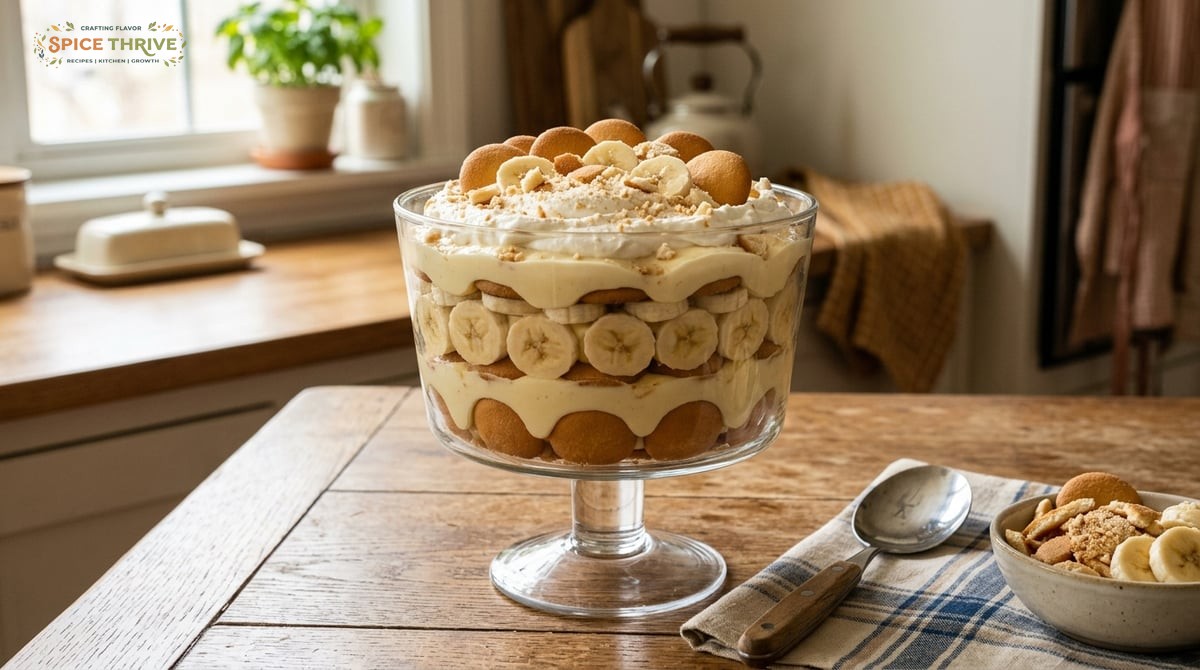
Banana Pudding: A Comforting Classic to Share
Banana pudding has always felt like a warm hug in a dish to me. My first taste was at a summer family reunion where my aunt layered wafers, silky custard, and sliced bananas in an old glass bowl. It was one of those desserts you couldn’t forget—cool and creamy on a hot day, and somehow deeply comforting, too. The adults reminisced while the kids fought over the last scoop, everyone smiling. Now, I make it for potlucks, birthdays, or just when the craving hits. Over the years, I’ve experimented: different brands of vanilla wafers, thicker layers of pudding, more or fewer bananas. Whether it’s served in a fancy trifle bowl or a simple glass dish, it never fails to bring people together. Friends who “don’t like bananas” have been converted. After countless tweaks (and at least six tests!), I’ve landed on a version that nails the silky texture, mellow banana flavor, and that playful crunch from cookies. With a recipe that balances nostalgia and just the right level of indulgence, you’ll understand why banana pudding is a must-make. Grab a spoon—let’s make my tried-and-true banana pudding recipe your new staple dessert.
Why You Will Love This Banana Pudding Recipe
- Creamy, rich custard from scratch: No instant mixes here. You get deep vanilla flavor, silky pudding, and just enough sweetness, every time. Homemade custard also means you can control the consistency: thick enough to hold its layers, never gluey or runny.
- Balanced banana goodness: Ripe bananas are layered so every spoonful offers fruit, cookies, and creaminess together—no gray mush or overpowering flavor. The technique ensures the bananas melt into the custard but still hold their own bite. You won’t end up with brown, soggy fruit, but instead fresh flavor all the way through.
- Classic vanilla wafers with a twist: Toasting the wafers brings out buttery notes and keeps the bottom layers from getting soggy. This extra step creates flavor depth reminiscent of caramelized cookies and adds a detectable crunch, even after overnight chilling. Try a handful plain and toasted side by side—you’ll taste the upgrade.
- Perfect for making ahead: This dessert rewards patience. The flavors deepen and meld as it chills. Plus, it frees you up before a party. You’ll notice the wafers absorb custard, becoming tender and cake-like, but they never fully dissolve, thanks to the toasting step. Guests will ask for leftovers, but there rarely are any.
- Kid and grown-up approved: I’ve served this to people from age 2 to 82 at gatherings, and it always vanishes first. Even picky eaters are lured in by the creamy pudding and familiar cookies. For parties, I’ve made mini cups for easy serving—they get snapped up in minutes.
Ingredient List—What You Need and Why
- Whole milk (2 cups / 480ml): Creates the creamy base. You can swap 1 cup (240ml) for half-and-half for extra richness. Avoid low-fat milk—your pudding will lack body and won’t set properly.
- Heavy cream (1/2 cup / 120ml): Boosts richness and helps the pudding set without being too dense. This is the secret behind a lush, decadent result. Skim or low-fat cream will make the dessert taste bland.
- Large eggs (2, plus 1 yolk): The eggs thicken and give body to the custard. Using an extra yolk creates a luxurious texture. Note: Contains eggs. If you want to use pasteurized eggs for safety, that works well here and won’t alter flavor or texture.
- Sugar (2/3 cup / 130g): Sweetens the pudding just enough. Some store versions taste cloyingly sweet; this amount keeps things pleasant and highlights the banana and vanilla. If your bananas are extremely ripe, taste as you go.
- Cornstarch (2 tablespoons / 18g): Ensures a smooth, lump-free pudding. If needed, you can use flour, but cornstarch yields a silkier result. The cornstarch also helps stabilize the custard, making the pudding more forgiving if slightly overcooked.
- Pure vanilla extract (1 tablespoon): Gives backbone flavor. Don’t skip or skimp! Vanilla is what turns a basic custard into a dessert worth craving. Use the real extract—imitation is noticeably artificial here since vanilla takes center stage. If you have vanilla bean paste or a split pod, use it for extra depth.
- Unsalted butter (2 tablespoons / 28g): Adds richness and shine to the custard. Melting in the butter at the end softens sharp eggy notes, making everything velvety. If using salted butter, reduce the added salt by half.
- Vanilla wafers (about 45 cookies / 150g): Traditional, but you can try digestive biscuits, graham crackers, or shortbread for variation. Toasting optional—but recommended. The cookies create structure as well as flavor; pick a sturdy (not flaky) brand for best results. For a nutty twist, try butter cookies with a hazelnut element.
- Ripe bananas (4 medium): Look for yellow with brown speckles. Too firm and the flavor is muted, too soft and they turn mushy. Bananas at prime ripeness will keep their color and add creamy texture. Size isn’t crucial—just aim for about 2 cups sliced.
- Sea salt (1/8 teaspoon): Balances and sharpens every flavor. Even a small pinch makes the vanilla and banana pop. If using table salt, reduce slightly to avoid overseasoning.
Allergens: Dairy, eggs, gluten (from wafers). Use substitutions below for specific dietary needs! Double-check cookie packaging for cross-contamination if necessary.
Step-by-Step Instructions (With Real Experience)
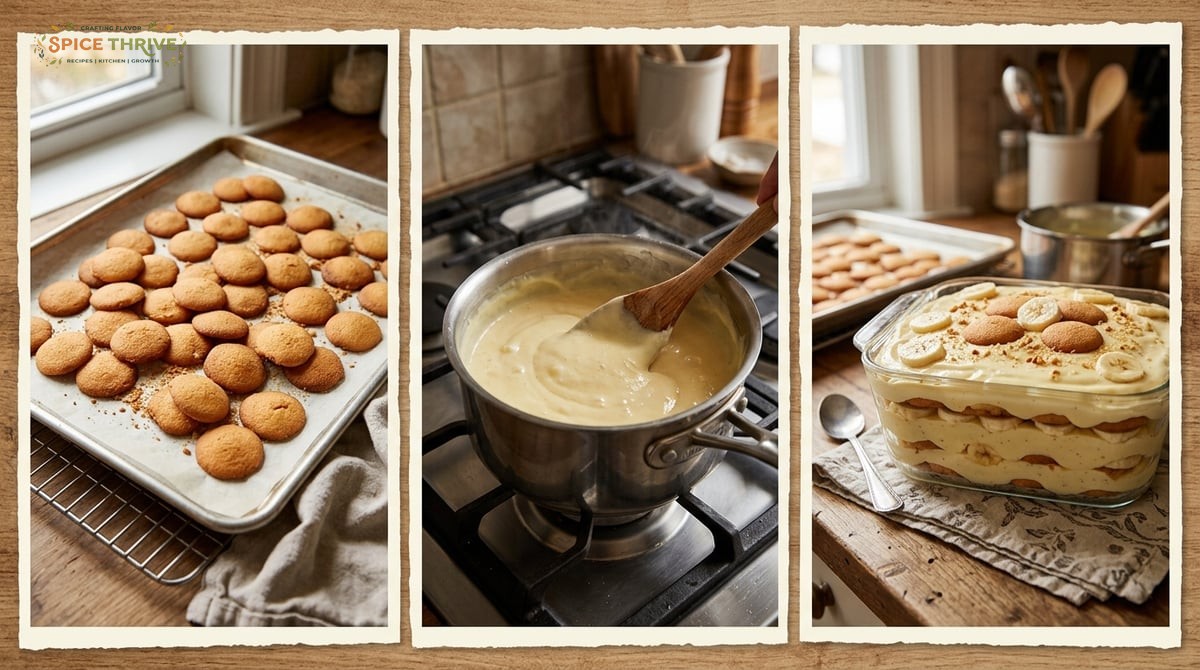
1. Toast the wafers (optional, but lovely): Spread cookies on a baking sheet and toast at 300°F (150°C) for 5-8 minutes. They’ll smell buttery and take on a gentle golden edge. Let them cool while you prep the pudding. Toasting removes some residual moisture and prevents them from fully dissolving into the custard. As a bonus, toasted wafers make the base layer stand up to several days of storage.
2. Cook the custard: In a medium saucepan, whisk milk, cream, half your sugar, salt, and cornstarch together until smooth. In a large bowl, whisk eggs, egg yolk, and remaining sugar. Place milk mixture over medium heat, whisking until it’s steaming but not boiling. Slowly pour some hot milk into the eggs, whisking (to temper). Pour the egg mix back into the pot, whisk again, and cook—stirring constantly—until the custard thickens and makes thick ribbons, about 6-8 minutes. Look for the surface to become glossy and for slow bubbles at the edge. The key is to keep the heat moderate and your whisk in motion—scorching or boiling can cause an unpleasant scramble effect. If your custard thickens unevenly, a quick pass through a fine-mesh strainer creates a perfect finish.
3. Finish the pudding: Remove from heat, whisk in butter and vanilla. Pour into a clean bowl and press plastic wrap onto the surface to prevent a skin. Chill for at least 1 hour. The plastic wrap step is essential—otherwise, a rubbery layer forms that never mixes back in. For a richer flavor, you can chill overnight (the vanilla deepens).
4. Assemble: Slice bananas into 1/2 inch (1.2cm) coins. In a large trifle bowl or 9×13 dish, layer wafers, bananas, and spoonfuls of custard. Repeat, ending with custard. Sprinkle extra crushed wafers on top for texture. Press each layer gently with a spatula to compact, but don’t mash the bananas. Aim for at least two full rounds for best presentation—wafers on the bottom, then banana, then custard, repeating until you reach the top of your dish. For tall trifles, a third layer adds wow factor, especially when serving company.
5. Chill: Cover and refrigerate at least 4 hours, or overnight. Longer chilling melds flavors and softens the cookie layers just right. You’ll notice the bananas slightly infuse the custard with gentle flavor, and the wafers become cake-like but hold a slight chew. If you’re assembling in advance, keep it tightly covered—any exposed bananas will oxidize faster.
6. Serve: Scoop into bowls. Watch as guests fight for that perfect bite—banana, wafer, and creamy custard together. For fancier presentation, garnish each serving with a wafer and fresh banana slices just before serving. If serving for a crowd, individual cups or mason jars make for easy, mess-free scooping and transport. This pudding is best at fridge temperature—if it sits out for an hour, it’s still silky, but don’t leave it more than two hours in warm weather.
Pro Tips from Testing (and What Went Wrong)
- Grainy pudding? I once hurried and boiled the custard—don’t! Low and slow, with constant whisking, makes it silky. If it gets lumpy, push the pudding through a fine mesh sieve before chilling. If you accidentally overcook, even for 30 seconds past thickening, this step can rescue your batch. Also: always use fresh cornstarch; old cornstarch can clump and not dissolve.
- Bananas discoloring? Drizzle or brush them lightly with fresh lemon juice (not too much, or it turns tangy). This buys another day of bright yellow slices. Another trick: layer enough custard over bananas that they are mostly shielded from air exposure and oxidation won’t be as much of an issue. If your bananas have very thin skins or are very ripe, slice immediately before layering.
- Soggy bottom layer? Toast the wafers and let the pudding cool before layering—warm custard melts them. Also, don’t layer too thickly at the bottom. For very crisp bottom layers, double-toast the first batch (10 minutes at 275°F/135°C) or use a heartier biscuit variety. If assembling individual puddings, make thinner bottom layers for extra crunch.
- Made it too sweet? I recommend sticking to the sugar levels here; adding too many bananas makes it cloying. Taste each banana before slicing—sometimes the ripest ones are surprisingly sugary. You can counteract accidental over-sweetness by adding a couple tablespoons of Greek yogurt to your custard before chilling, which balances the flavor and lightens the texture.
- Bland flavor? High-quality vanilla and a pinch of salt truly wake up this pudding. Don’t skip them! If you find your flavor still lacking, try infusing the milk with a split vanilla pod or even a cinnamon stick (remove before assembling) for a subtle warming note.
I tested this recipe six times and learned something each go—chill time and patience make all the difference. Each batch was a little better for small improvements: straining lumpy custard, letting the pudding chill thoroughly, and using freshly toasted wafers made my final version a winner every time. Don’t rush the process—the payoff is a banana pudding you’ll be proud to bring anywhere.
Variations, Swaps, and Dietary Options
- Gluten-free: Use certified gluten-free vanilla wafers or swap with gluten-free shortbread cookies. Trader Joe’s and Kinnikinnick both make wafers that work well. Always check for cross-contamination warnings if serving to those with celiac or severe allergies.
- Dairy-free: Substitute almond or oat milk for the whole milk, and coconut cream for the heavy cream. Use a plant-based butter and check your cookies for dairy. The coconut cream adds a mildly tropical note that pairs beautifully with banana. Some brands of oat milk create a slightly thicker custard than almond, so choose your preference.
- Vegan: Pair the dairy-free swaps with a vegan egg substitute (such as JUST Egg or cornstarch-thickened nondairy milk). It won’t be quite as rich but still delicious. Agar powder (1/2 tsp, bloomed in liquid) can also help the pudding set, or silken tofu blended smooth—taste as you go and adjust vanilla for flavor.
- No-cook version: You can swap homemade custard with a high-quality instant vanilla pudding, but the homemade product tastes much better and holds up longer. For a quick fix, combine instant pudding with whipped topping and layer as usual. This is handy for picnics or when short on time—just note the dessert will be lighter and less dense.
- Asian-inspired: Try adding a teaspoon of matcha powder to the custard or use coconut cream throughout for a Southeast Asian twist. A few pinches of toasted sesame seeds on top or a drizzle of black sesame paste into the custard gives a striking finish. For even more variety, diced mango or lychee can replace part of the banana for an unexpected pop of sweetness.
If you experiment, let me know in the comments! Banana pudding is endlessly adaptable and fun to customize. I’ve heard from readers who stirred in peanut butter, layered with Nutella, or crumbled in biscotti—feel free to make this your own.
Make Ahead, Storage, and Reheating Tips
- Make ahead: Banana pudding is happiest when made at least 4 hours ahead or overnight. The flavors marry and the wafers soften to that classic, cake-like bite. I often assemble in the evening, so dessert is ready to serve the next day for a brunch or barbecue. In fact, a 24-hour chill intensifies flavor and keeps everything intact for serving.
- Storage: Store covered in the fridge for up to 3 days. After 48 hours, the bananas may darken but will taste fine (see tips on keeping them yellow above). Use an airtight container or a well-wrapped baking dish—exposure to air speeds up discoloration and causes the top layer to dry out. If prepping for an event, a double-layer of plastic wrap or a fitted lid preserves freshness.
- Reheating (not recommended): This is best served cold or at cool room temperature. Heating changes the texture and may curdle the custard. If you want a slightly softer texture without chilling, let it stand at room temperature for 15–20 minutes before serving, but keep chilled for food safety if not eaten promptly.
- Freezer: I don’t recommend freezing. Bananas become watery and wafers lose all texture when thawed. Even tightly wrapped, the pudding layers separate and the custard loses its smoothness.
The good news is, leftovers rarely last that long! If you do need to transport banana pudding, keep it chilled in a cooler and serve soon after arrival—freshness is part of its magic.
Printable Recipe Card: Banana Pudding
Banana Pudding Recipe
- Prep time: 30 minutes
- Cook time: 15 minutes
- Total time: 4 hours 45 minutes (includes chilling)
- Yield: 10 servings
Ingredients
- 2 cups (480ml) whole milk
- 1/2 cup (120ml) heavy cream
- 2 large eggs plus 1 yolk
- 2/3 cup (130g) sugar
- 2 tablespoons (18g) cornstarch
- 1 tablespoon vanilla extract
- 2 tablespoons (28g) unsalted butter
- 1/8 teaspoon sea salt
- 45 vanilla wafers (150g)
- 4 ripe bananas
Instructions
- Toast wafers at 300°F (150°C) for 5-8 min. Cool. For extra crunch, toast two batches and reserve the crispest pieces for the topping.
- Whisk milk, cream, half the sugar, salt, and cornstarch in saucepan. Whisk eggs, yolk, and remaining sugar in bowl. Temper eggs with hot milk, return to pot, cook on medium, whisking, until thick (6-8 min). Remove from heat, stir in butter and vanilla. If custard appears lumpy, strain before cooling.
- Chill pudding 1 hour. Cover surface with plastic wrap to avoid a skin. Longer chilling (up to overnight) deepens the flavor.
- Layer wafers, banana slices, and custard in dish. Repeat for at least two layers. Press layers gently to compact. Top with crushed wafers. Chill 4+ hours for best texture.
- Serve cold. Garnish bowls with a wafer and fresh slices if desired.
Estimated Nutrition (per serving):
Calories: 300 | Protein: 5g | Fat: 11g | Carbs: 44g | Fiber: 2g | Sugar: 25g
Allergens: Dairy, eggs, gluten (see section above for swaps)
Retested and updated: June 2024
Ready to Make Banana Pudding? Let’s Cook Together!
I hope this banana pudding recipe brings as much comfort and joy to your table as it does to mine. Don’t forget to snap a photo and leave a comment with your tweaks—your kitchen victories help everyone grow. Some readers have told me they made this for Mother’s Day, others for summer picnics and even tailgates—it truly shows up for every occasion. For more sweet treats and well-tested comfort food, check out my chocolate chip cookie recipe, my guide to mastering homemade brownies, or explore Spice Thrive’s dessert archives for pies, bars, and no-bake wonders. If you’re new here, my recipes focus on approachable flavors and always include tips for success. Happy cooking!
— Jamie, home cook and creator at Spice Thrive
Banana Pudding Recipe: FAQ
Can I make banana pudding the day before?
Yes! In fact, it’s even better after a night in the fridge. The flavors meld and the wafers soften to the ideal texture. If you’re planning ahead for a party, preparing it a day in advance ensures the best taste and texture. Just remember to cover tightly to avoid banana discoloration.
How do I prevent my bananas from turning brown?
Slice bananas just before assembly, brush or toss lightly with lemon juice, and fully cover them with custard. These steps slow browning. If you’re making individual servings, layering bananas between custard and covering with plastic wrap helps preserve color even longer.
What if I don’t have vanilla wafers?
You can use shortbread cookies, graham crackers, digestive biscuits, or even sweet ladyfingers. Adjust for sweetness and texture as needed. Each option gives a slightly different foundation—grahams are heartier, while shortbread brings extra butteriness. Mix and match if you’re feeling creative.
Is homemade custard necessary?
Highly recommended! The taste and texture are next level. For a shortcut, high-quality instant vanilla pudding will work, but it won’t hold its shape as long. Homemade custard has a richer, fresher flavor and is more stable when chilled overnight.
Can I double this recipe for a crowd?
Absolutely. Use a larger trifle dish or make two 9×13 pans. Double all ingredients and add 10-15 more minutes to chill time. For even layers in a party-sized batch, prepare extra wafers and bananas—leftovers make a great snack.
This article was created with the help of AI. Images may also be AI-generated.

