Why Bottom Round Roast is a Hidden Gem in the Kitchen
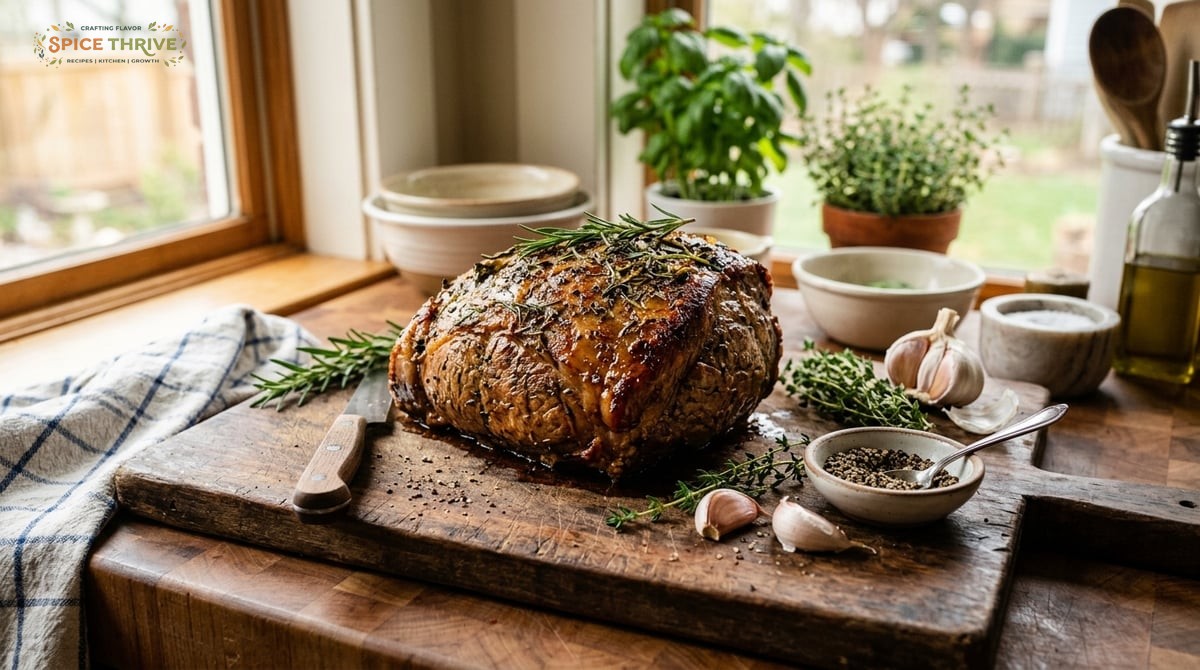
I first learned to cook bottom round roast in my tiny college apartment, standing over a battered Dutch oven while snow swirled outside. A good friend handed down the family recipe, promising I’d have leftovers all week—and she was right. Since then, I’ve tinkered and tested this affordable cut at least a dozen times, trying every trick to make it tender, juicy, and full of flavor. For cozy nights, for Sunday dinners, for feeding a crew (or stocking the fridge), this is my comfort food secret weapon.
Why You’ll Love These Bottom Round Roast Recipes
- Budget-Friendly: Bottom round roast is often overlooked because it’s lean and inexpensive, but with the right technique, it transforms into a richly flavored main course that tastes far more luxe than it costs. For example, when meal planning for a busy family, one 3-pound roast can feed a crowd or provide several days’ worth of lunches for the same price as two steaks. It’s also almost always on sale or available from local butchers, making it a go-to when you want quality beef without maxing out your grocery budget.
- Surprisingly Tender: It’s all about slow roasting or braising—my recipes use low temp and enough moisture or a simple spice rub to coax out the juiciness. When prepared properly with just a little patience and technique, even picky eaters are shocked by how tender the slices turn out—think weeknight pot roast meets special-occasion roast beef, without the dryness people fear.
- Versatile Meals: Use leftovers for sandwiches, stir-fries, or grain bowls. I include my favorite ways to use every last slice, so nothing goes to waste. Try it piled on crusty bread with horseradish for a deli-style treat, or dice it up for fried rice, tacos, or hearty soups. Even cold, the roast makes a superb topping for salads with blue cheese, pickled onions, or any sharp vinaigrette.
- Global Flavors: From classic herb-crusted American to soy-ginger braised or garlicky Mexican-style, these recipes let you spin this cut any way you like. If your household likes to travel the world at dinnertime, this single roast can serve as a base for at least a half-dozen distinctive cuisines.
- Try a French-style version with Dijon and thyme for Sunday dinner.
- Or go Korean with gochujang marinade and serve it with rice and quick pickles.
- Straightforward Steps: No hard-to-find equipment or intimidating skills—just trusted home-kitchen know-how, written with every cook in mind. You’ll use one pot (or roasting pan), standard oven temperatures, and staple spices for maximum ease, whether it’s your first time roasting or your hundredth.
Ingredient List & Smart Swaps for Roast Success
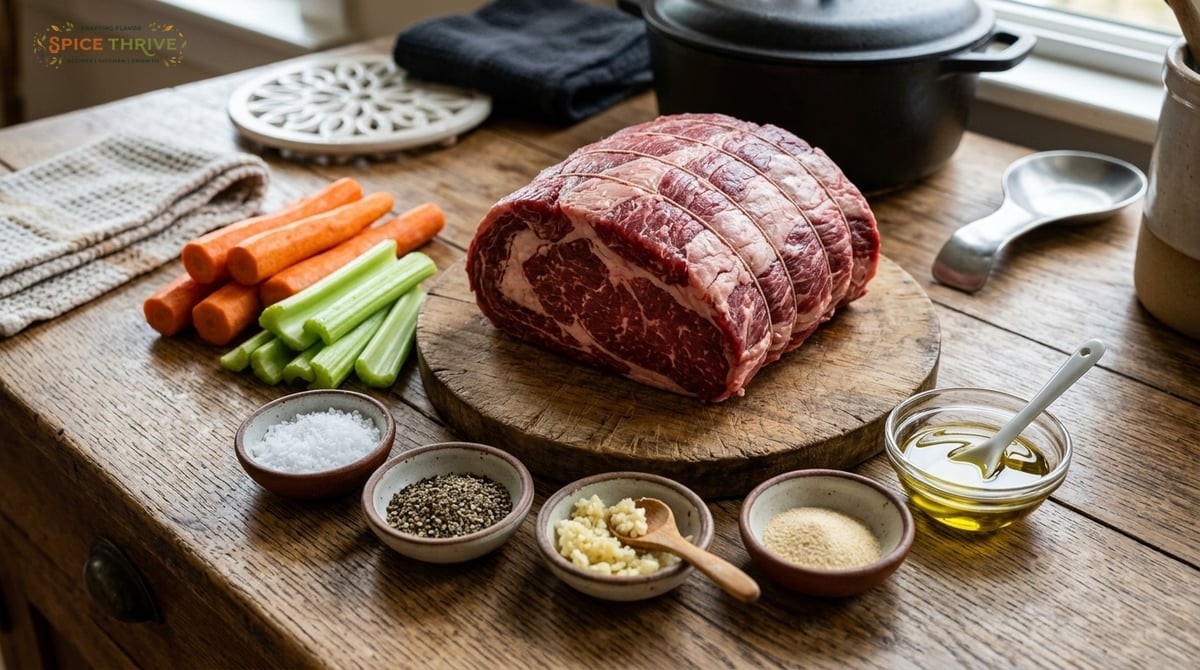
Below are the essentials for my go-to classic bottom round roast, plus how each ingredient works and what you can swap if needed. Exact measurements included!
- Bottom round roast (3 lbs / 1.36 kg): The star—lean, beefy, and economical. This recipe is tested with Choice grade beef, but Opt for Prime or Grassfed if you want even more flavor. Grassfed beef makes the roast slightly richer and more robust, while Prime offers more marbling for a softer bite. Both options work exactly the same for timing, so buy what fits your budget.
- Kosher salt (2 tsp / 10 g): Draws out moisture to help the crust form and seasons the meat throughout. If using table salt, reduce amount by about a quarter.
- Freshly ground black pepper (1 tsp / 3 g): Adds essential bite and aroma. For heat lovers, a pinch of cayenne or crushed red pepper can be added.
- Garlic cloves (4, smashed): Rubbed on for a mellow roasted base note. You can swap for 1 tsp garlic powder if needed, but fresh is best. Try roasting whole peeled cloves alongside the beef for a sweeter flavor.
- Onion powder (1 tsp / 3 g): Subtle sweetness and savory depth. Onion granules can substitute 1:1, or use ½ a fresh chopped onion sautéed with the carrots and celery for a bit more texture and flavor.
- Olive oil (2 tbsp / 30 ml): Helps the exterior brown and the seasoning stick. Substitute canola or avocado oil if you like. Grapeseed oil is also a good high-heat neutral alternative.
- Carrots (2 large, cut into big chunks): Bed for roasting and adds a sweet, earthy flavor to both roast and drippings. They soak up beefy juices and become a bonus side dish. If you like more sweetness, toss in a parsnip or two.
- Celery stalks (2, cut into chunks): Delivers extra flavor without overpowering. If you dislike celery, leeks or fennel bulb offer excellent fragrance and gentle flavor.
- Beef broth (1 cup / 240 ml): Essential for keeping things moist in the oven. Chicken broth or water with a splash of soy sauce works too. For extra richness, use a mix of red wine and broth (try ½ cup each), perfect for French-inspired variations.
- Optional Spices & Herbs: Try rosemary, thyme, or a bay leaf for classic notes, or smoked paprika for a deeper flavor. Fresh herbs infuse the drippings and make for a more aromatic sauce or gravy, while a little brown sugar or honey in the rub can give the crust a subtle sweetness.
Allergen notes: Naturally gluten free and dairy free. Double check your broth and spices if sensitive. Certified gluten-free and low-sodium broths are widely available for special diets.
Step-By-Step: My Tested Bottom Round Roast Method
This is my tried-and-true method after a string of chewy, disappointing early attempts. Follow along and I’ll walk you through every step as if we’re cooking side by side:
- Pat the roast dry with paper towels—this helps you get that beautiful brown crust. Season all sides with salt, pepper, garlic, and onion powder. Let it rest at room temp for 30 minutes for even cooking. This resting step promotes more even temperature throughout the meat, reducing the chance of a raw or cold center, and helps the salt start to break down tougher muscle fibers for improved tenderness.
- Preheat your oven to 275°F (135°C). Low and slow is the secret. Higher temperatures will toughen the roast and can leave you with gray, unappetizing slices. Be patient—slow roasting is what transforms this affordable cut.
- Brown the roast. Heat the olive oil in a Dutch oven or heavy oven-safe skillet over medium-high. Sear each side for about 3-4 minutes until deeply golden and fragrant. Don’t rush this part—developing a crust not only builds flavor but keeps juices inside for slicing later. If the roast sticks to the pan, give it another 45 seconds before turning; the browning releases it naturally.
- Build the flavor base. Remove the meat briefly. Add carrots and celery to the pan, stirring in the flavorful fond. Return the roast, nestling it atop the veggies. This step ensures the roast absorbs the vegetables’ aromas and the deglazed “fond”—all the tasty bits stuck to the bottom adds rich depth to the pan juices. Some home cooks add halved garlic bulbs or sprigs of fresh herbs at this stage for even more aroma.
- Add broth. Pour the broth around the roast (not on top) to keep the crust crisp but the bottom moist. If you’re using wine, add it here too. This liquid will slightly steam and gently braise the underside of the meat (and vegetables), leading to a more even, tender result throughout the roast while preventing dryness. You can also toss in a bay leaf or a sprig of thyme for extra flavor.
- Cover tightly. Use a lid or wrap the pan in foil to trap moisture. Proper sealing is crucial—it creates a gentle steam environment that softens the tough fibers but keeps the exterior from getting soggy.
- Roast in the oven for 2.5 to 3.5 hours, or until a thermometer reads 135°F (57°C) for medium rare or 145°F (63°C) for medium. Cheaper cuts are forgiving, but overcooking leads to dryness—check at 2.5 hours. For larger or smaller roasts, add or subtract about 20 minutes per half pound. Use an instant-read thermometer for accuracy—internal color can be deceiving.
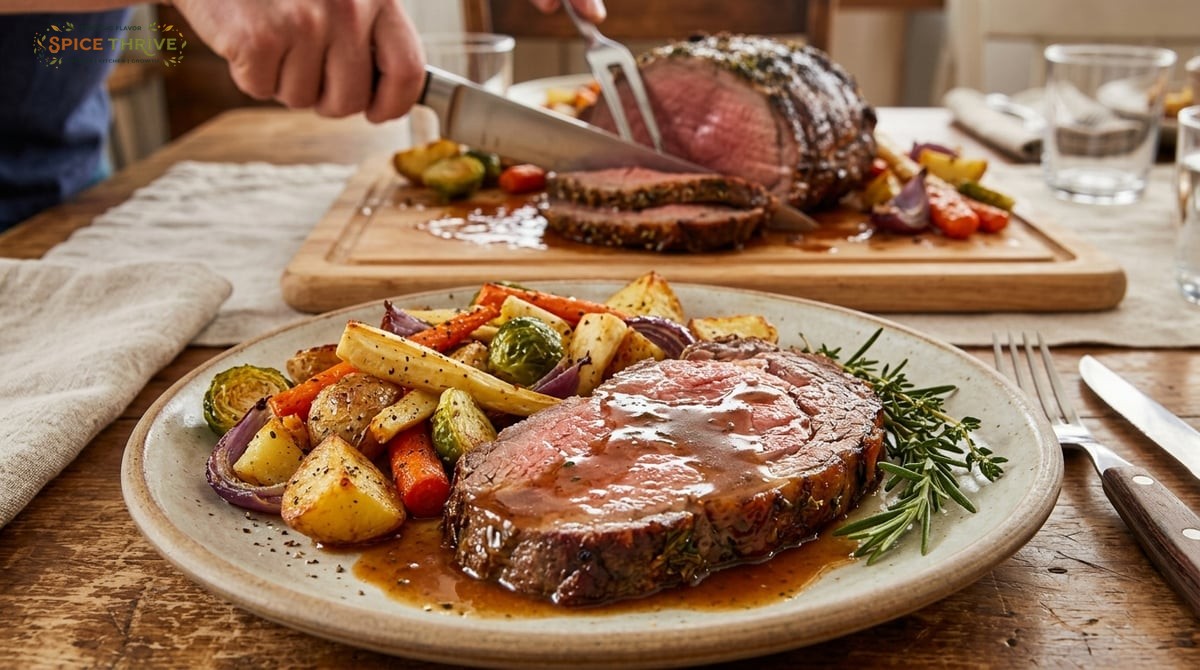
- Rest, then carve. Transfer the roast to a board, tent loosely with foil, and let rest 20 minutes. This is vital for juicy slices! Cut against the grain for best tenderness. The resting period allows juices to redistribute into the meat rather than spilling out on your cutting board. While it rests, skim excess fat from the pan juices and strain if desired, making an easy au jus to serve alongside.
If serving for a dinner party, slice only what you need and gently warm the rest in pan juices to keep leftovers perfectly tender and moist for later.
Test Kitchen Pro Tips (and What I Learned the Hard Way)
- Don’t skip the pat-and-rest: Skipping the drying step leads to steaming, not browning. Letting the roast sit before cooking means more even doneness. Plan ahead—while the roast rests at room temp, you can chop vegetables and set the table to make the most of your prep time.
- Sear thoroughly: That deep, mahogany color pays off in both flavor and appearance. If you rush this, the roast tastes bland. Give each side at least 3 minutes, and don’t overcrowd the pan—good contact with the hot surface is essential. Searing is your main opportunity to build complex flavor.
- Don’t drown the roast: Broth is for gentle steaming, but too much makes the exterior soggy. Resist the urge to add more—even if it looks like a small amount, it’s plenty for slow roasting and basting later. The vegetables and meat will release additional juices as they cook.
- Let it rest (really): I was impatient the first time and paid with dry, tough slices—resting makes or breaks the texture. Investing 20 minutes at the end feels long, but the roast stays much juicier and easier to carve. Use this time to toss together a salad or make mashed potatoes.
- Carve across the grain: Essential. Cutting with the grain leaves the roast stringy and chewy. With this cut, the grain is usually easy to see—look for lines running through the meat and cut perpendicular for maximum tenderness. A long, sharp carving knife, or even an electric knife, can make slicing easier if you’re serving a crowd.
- Troubleshooting dryness: If you overshoot the temp, slice thin and serve with the pan juices or make a quick gravy. Or, repurpose drier slices into beef salad with mayonnaise, celery, and herbs, or add to a rich soup—nothing goes to waste!
Variations and Dietary Swaps: Global Flavors for Every Table
Once you master the basics, you can spin bottom round roast toward any craving. Here are some of my favorite tested twists (all delicious after 2-3 attempts each!):
- Asian-Style Soy-Ginger Braised: Replace half the broth with low-sodium soy sauce and add a splash of mirin and fresh ginger slices. Serve with steamed rice and bok choy. For an extra hit, toss in a star anise and a dash of sesame oil to the braising liquid. To finish, slice the roast thin and sprinkle with scallions and sesame seeds. Leftovers make a killer beef fried rice or noodle stir-fry.
- Garlic & Oregano Mexican Style: Rub with a blend of garlic, dried oregano, and cumin. Swap carrots and celery for poblano peppers and onions. Finish with lime juice and serve as taco filling. Transform leftovers into a spicy beef and black bean chili, or shred for quesadillas and burrito bowls. Try incorporating chipotle chili powder or smoked paprika to deepen the flavor if you like heat.
- Classic Onion Soup Roast: Use a packet of gluten-free onion soup mix (careful with sodium!) instead of separate spices, and add pearl onions to the pan. This shortcut gives a familiar sweet-and-savory flavor like your favorite diner roast beef. Serve with crusty bread or fluffy mashed potatoes to soak up every last bit of savory broth.
- Vegetarian Option: While you can’t replicate beef exactly, roasting a whole cauliflower or celeriac with similar seasonings creates a hearty, centerpiece-worthy main. Brush the vegetables with olive oil, season, and roast on a bed of aromatic veg with a splash of broth. Slice and serve like a roast with the same sides and pan juices for a satisfying plant-based meal.
- Allergen swaps: Use coconut aminos for soy-free Asian version. Always verify store-bought broths for gluten, especially if celiac. If dairy-sensitive, skip finishing with butter; use olive oil or any mild-tasting non-dairy substitute. These swaps allow nearly everyone to enjoy a great roast dinner, no matter the dietary restriction.
Storing, Reheating, and Make Ahead Tips
Bottom round roast is a meal planner’s best friend. Here’s how I keep it fresh and flavorful all week:
- Refrigerator: Store cooled slices tightly wrapped or in an airtight container for up to 4 days. Add a splash of pan juices to prevent drying out. For meals on the go, pre-slice and portion into meal-prep containers with roasted vegetables or grains for quick grab-and-heat lunches.
- Freezer: Freeze slices (in a single layer until solid, then stack) for up to 3 months. Thaw slowly in the fridge before reheating. For best texture, wrap portions tightly in foil or freezer-safe bags with an extra spoonful of broth to help protect against freezer burn. To save time, freeze cubes for soup or stew additions later.
- Reheating: For juicy results, place slices in a baking dish, sprinkle with broth, cover tightly with foil, and heat in a 275°F (135°C) oven until warmed through. Or, heat gently in a skillet with pan juices. Avoid microwaving if possible—it tends to toughen lean meat. If you must, use short intervals at half power and cover with a damp paper towel.
- Make ahead: You can prep and season the roast up to 24 hours ahead (wrap tightly and refrigerate). Remove from fridge 30-60 minutes before cooking. This lets you simply pop it in the oven after work or before company arrives, making busy nights a little less hectic. Leftover pan juices freeze beautifully and can be used for other recipes or quick gravies.
Tip: If you like meal planning, try doubling the recipe and cooking two roasts side by side, then freezing one whole or in portions for a future hands-off dinner with no prep required.
Printable Recipe Card: Classic Bottom Round Roast
Classic Bottom Round Roast
Prep time: 20 minutes
Cook time: 3 hours
Total time: 3 hours 40 minutes
Yield: Serves 8
- 3 lbs (1.36 kg) bottom round roast
- 2 tsp (10 g) kosher salt
- 1 tsp (3 g) black pepper
- 4 garlic cloves, smashed
- 1 tsp (3 g) onion powder
- 2 tbsp (30 ml) olive oil
- 2 large carrots, chunked
- 2 stalks celery, chunked
- 1 cup (240 ml) beef broth/li>
- Optional: herbs/spices (thyme, rosemary, paprika, bay leaf)
- Pat roast dry, season with salt, pepper, garlic, and onion powder. Let rest 30 minutes.
- Preheat oven to 275°F (135°C). In a heavy pan, heat oil and sear roast 3-4 mins per side.
- Add carrots and celery; return roast and pour broth around (not over) the meat. Add optional herbs.
- Cover tightly, roast 2.5-3.5 hours to 135°F (57°C) for medium-rare.
- Rest roast 20 minutes, carve against the grain, and serve with pan juices.
Estimated nutrition (per serving): 290 kcal, 32g protein, 14g fat, 4g carb.
Allergen notes: Naturally gluten free, dairy free. Check your broth if sensitive.
Retested and updated June 2024. Photos are my own in-process shots—see more on the About page.
Related recipes from Spice Thrive: Try our slow cooker beef stew or herb roast chicken for more comfort classics.
Like This Recipe? Let’s Keep Cooking Together!
Thank you for cooking with me and getting to know bottom round roast a little better. If you try these recipes or have questions, let me know in the comments—I answer them all! For more real-world, test-kitchen recipes with everyday ingredients and plenty of flavor, follow Spice Thrive or sign up for our newsletter. Happy roasting!
—Written by Jamie at Spice Thrive. Read more about me and my kitchen at the About page.
Common Questions
Can I cook bottom round roast in a slow cooker?
Absolutely. Follow the same seasoning/searing steps, then cook on low with the veggies and broth for 8-10 hours until fork-tender. This is especially helpful if you’re busy—just set it and forget it, and you’ll find the roast carves just as easily and works perfectly for sandwiches, tacos, or classic roast beef dinners.
My roast is tough — what went wrong?
Most likely it was undercooked (not enough time to break down connective tissue) or overcooked (went above 150°F/65°C). Slice extra thin and serve with plenty of sauce to compensate. For next time, consider checking internal temperature earlier and letting the roast rest longer. Also, older or grassfed beef can be firmer—so always cut across the grain and serve with pan juices.
Do I have to marinate the roast overnight?
No, but resting it with salt for at least 30 minutes improves flavor and texture. Marinating is optional and depends on flavor style. For certain global variations, like Asian-inspired or Mexican-style, a 1-2 hour quick marinade can boost taste but isn’t required for tenderness.
Best way to slice for sandwiches?
Slice very thinly, across the grain, with a sharp carving knife. Warming the roast slightly makes slicing easier. If you have a home deli slicer, use it for ultra-thin results. Always serve in pan juices or with a bit of gravy for moisture—even when making cold sandwiches.
Can I use different vegetables in the pan?
Yes, potatoes, parsnips, onions, or bell peppers are all great. Adjust roasting times so everything is tender at the end. Root veggies and hearty greens like turnips or rutabaga can add earthiness, while swapping in sweet potatoes brings a subtle sweetness to the final flavor profile.
This article was created with the help of AI. Images may also be AI-generated.