A Pinch of Personality: Why I Love Cooking with Seasoned Salt
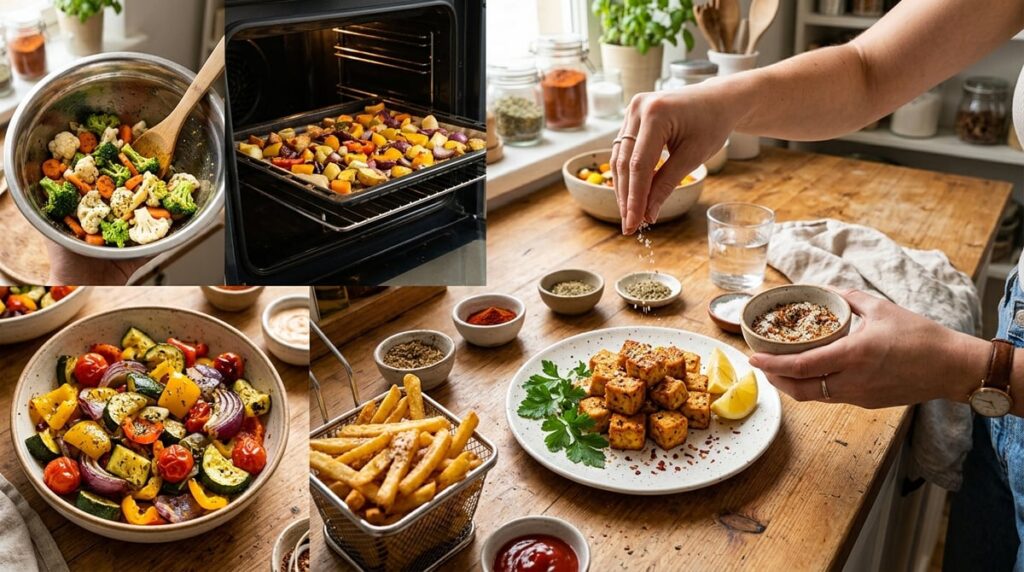
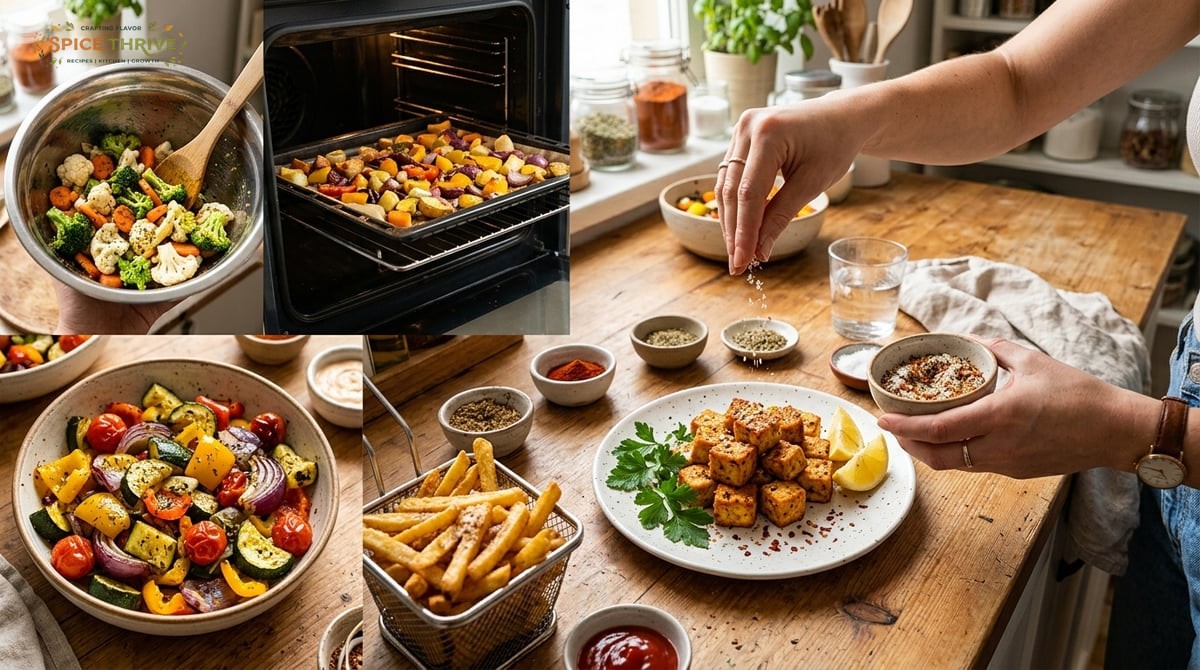
Every cook has a secret ingredient, and for me, it’s seasoned salt. My mom always kept a little shaker next to the stove—her “magic” for waking up roasted potatoes, chicken, or even the scrambled eggs she made us before school. When I moved into my first apartment, I tried to cook roasted veggies from scratch and realized salt alone didn’t cut it. Seasoned salt brought them to life. Over time, I started to notice the difference even after just a pinch: suddenly, carrots caramelized deeper, mushrooms sang, and corn off the cob became something guests would ask about. After testing dozens of recipes and creating my own blends, I’ve learned that this humble mix is the fastest way to restaurant-worthy flavor at home. Tasting side by side, a batch of plain potatoes will often fall flat compared to potatoes roasted with seasoned salt—aromatic, golden, and with layers of flavor in every bite. In this post, I’ve included my step-by-step seasoned salt blend, plus tested recipes from crispy fries and golden chicken to oven-baked tofu and savory cornbread muffins. You’ll even see photos from my own kitchen so you can cook along with confidence. Whether you’re feeding picky eaters or looking for easy ways to surprise guests, seasoned salt is a kitchen shortcut I return to again and again.
Why You’ll Love Cooking with Seasoned Salt
- Flavor in One Sprinkle: Seasoned salt is a layered, customizable mix of herbs and spices with just the right hit of saltiness. Every shake amps up the flavor, whether you’re roasting, pan-frying, or even baking. It’s especially handy when you’re making weeknight meals—think simple chicken breasts or last-minute veggie scraps—because it transforms basic ingredients into something memorable. Even leftovers turn new again with just a dash.
- Home Cook Tested: I’ve adjusted these recipes after many reruns—over-salted fries, bland chicken, limp roasted broccoli. Every flop taught me how to balance the mix, when to add it, and why a light touch usually wins. For example, I learned that seasoning fries before AND after roasting gave me the depth and pop I craved. My kids became excellent taste-testers, always quick to let me know if something was “too peppery” or “too boring.” Now, with each iteration, the flavors have become crowd-pleasers.
- One Blend, Many Dishes: The same batch will work wonders on poultry, potatoes, tofu, popcorn, or even homemade breads. Make a small batch to try, or double for busy weeks. I love how it can make sautéed green beans taste restaurant-level or turn simple oven-baked pita chips into a stellar snack. For nights when I’m short on groceries, I’ve tossed seasoned salt with canned beans and olive oil for a quick, addictive protein boost.
- Approachable & Flexible: You don’t need fancy gadgets—just a mixing bowl and measuring spoons. My family taste-tests every recipe, and if my eight-year-old says it’s “better than takeout,” I know it’s ready to share. You can easily tweak the blend for preferences or dietary needs: try adding a pinch of smoked paprika for a BBQ feel or substituting lemon pepper for a citrusy kick.
- Global-Friendly: Pair it with chaat masala for Indian-inspired fries or add a pinch of Sichuan pepper for a Chinese twist. This seasoned salt adapts to whatever cuisine you’re craving. It’s great sprinkled on shakshuka, added to taco fillings, or swirled into olive oil as a bread dip. Explore combinations—over grilled halloumi, sprinkled on roasted chickpeas, or finished on homemade flatbreads—and watch your recipes expand.
Ingredients: My Go-To Seasoned Salt Blend & Key Swaps
Seasoned Salt (makes about 1/2 cup / 120g):
- Fine sea salt – 1/4 cup (60g). Essential, sets the base. I find fine sea salt dissolves quickly, but kosher salt will give a crunchier, rustic touch to the mix if that’s your style.
- Paprika – 1 tablespoon (7g). Adds rich color and a warm, subtle sweetness. Use smoked paprika for a barbecue note. Sweet paprika will keep the flavor mellow, while smoked or hot paprika creates entirely new profiles.
- Garlic powder – 2 teaspoons (6g). Deepens savory flavor. Some brands vary in strength, so if yours is particularly strong, reduce by a pinch, or boost it for garlic-forward blends.
- Onion powder – 2 teaspoons (6g). Rounds out the blend with a hint of umami. Onion powder brings that allium depth without overpowering; it melds especially well when sprinkled on roasted meats or root vegetables.
- Black pepper – 1 teaspoon (3g), freshly ground for bite. If you like extra heat, sub half white pepper for a subtle warmth.
- Sugar – 1/2 teaspoon (2g), balances sharp edges. Omit for sugar-free. I sometimes use coconut sugar or maple sugar for a more caramelized undertone, especially in blends for baking or popcorn.
- Celery seed – 1/2 teaspoon (1g), for grassy, herbal notes. Sub dried dill if needed. Celery seed gives an almost nostalgic deli-counter flavor, excellent on bagels or homemade chips.
- Optional: Cayenne (1/8 tsp, 0.5g) for mild heat, or swap in white pepper for a subtler tingle.
Key Swaps: Use kosher salt if preferred (add slightly more for bigger grains), or swap in sumac for paprika for a tangy note. For MSG-free, skip any flavor enhancers and let your spices shine. You can also experiment by adding a pinch of dried herbs like thyme or oregano for an Italian twist, or cracked coriander seed for a citrusy burst. If you want something more aromatic, zest half a lemon and stir it in, using the salt as a preservative.
Step-by-Step: Crispy Oven Fries with Seasoned Salt
Prep time: 10 min
Cook time: 30 min
Total time: 40 min
Yield: Serves 4
Ingredients:
- Russet potatoes – 3 medium (about 1.5 lb/700g), scrubbed
- Seasoned salt – 2 teaspoons (7g), more to taste
- Neutral oil – 2 tablespoons (30ml)
Instructions:
- Preheat oven to 450°F (230°C). Line a baking sheet with parchment. High heat ensures crisp fries with fluffy insides, and parchment helps prevent sticking and burning.
- Cut potatoes into thick batons. Pat dry for max crispiness. Use a clean kitchen towel and remove as much moisture as possible; this single step radically elevates the final texture.
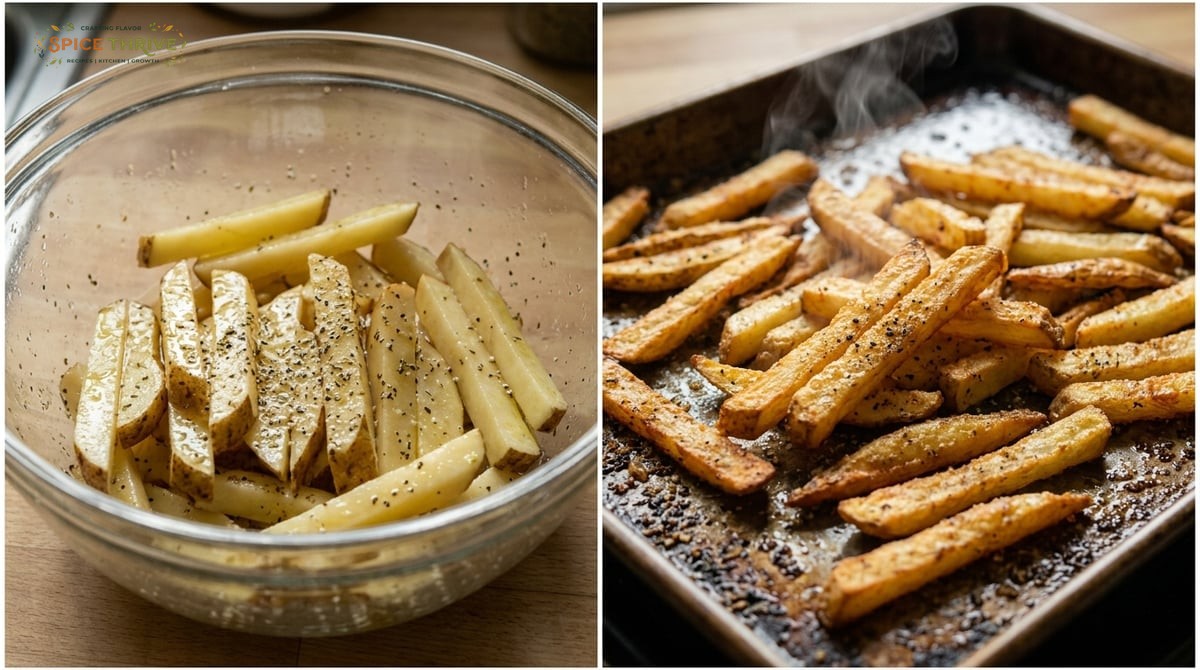
- Toss with oil and seasoned salt in a large bowl until evenly coated (see photo below). The potatoes should look glossy, not greasy. Use your hands to separate batons and ensure every piece is evenly seasoned—this avoids bland bites and reforms the seasoning if any clumps remained.
- Lay fries in a single layer. Bake 15 min, flip, then bake another 12-15 min until deep golden and edges are crispy. After flipping, rotate the sheet if your oven cooks unevenly.
- Cool 2 min on pan. Taste for seasoning. Serve hot with more seasoned salt as desired. These fries pair beautifully with everything from ketchup and garlic aioli to sriracha mayo or herbed yogurt dip, and are a perennial hit at both dinner parties and casual family meals.
First time I oversalted these and baked at too low a temp—resulting in limp, salty fries. Adjusted salt and increased temperature for perfect texture. Now, I sometimes double-batch, storing half raw (tossed in seasoned salt, then frozen on a tray) for nearly-instant, homemade fries any night of the week—just bake from frozen with a bit more oil and time.
One-Pan Seasoned Salt Chicken Thighs
Prep time: 10 min
Cook time: 40 min
Total time: 50 min
Yield: 4 servings
Ingredients:
- Bone-in chicken thighs – 4 (about 2 lb/900g), skin on
- Seasoned salt – 1 tablespoon (9g)
- Butter or olive oil – 2 tablespoons (30g)
Instructions:
- Preheat oven to 425°F (220°C).
- Pat chicken dry (for crisp skin) and place in a metal baking dish. Rub skin all over with butter or oil, then season generously with seasoned salt, tucking some under the skin. Massaging the blend under the skin boosts flavor penetration and makes every bite juicy.
- Bake 35-45 min until juices run clear and skin is golden, crisp, and sizzling. Internal temp should read 165°F (74°C). Let rest 5 minutes before serving—the juices will redistribute for even more succulent meat.
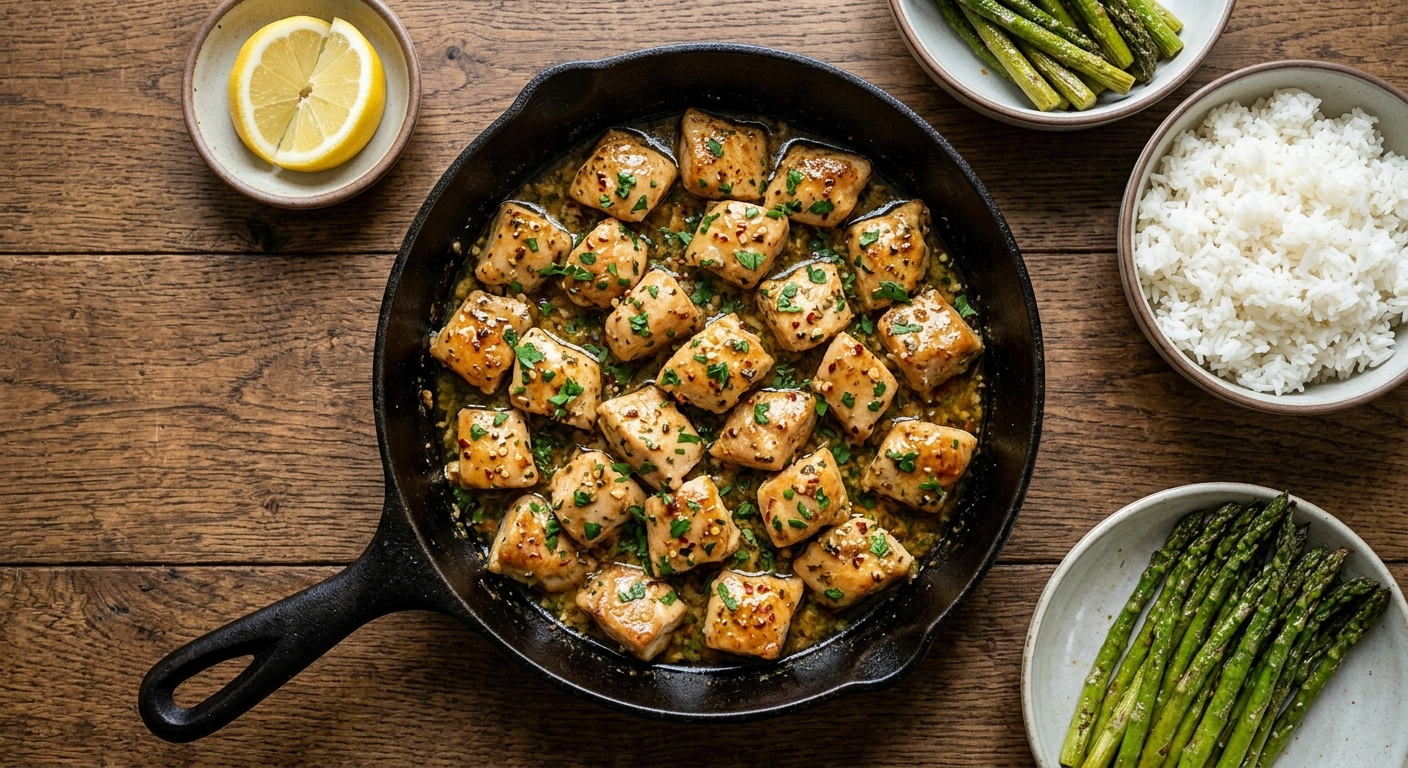
For extra flavor, nestle quartered onions, garlic cloves, and root vegetables around the thighs to roast in the seasoned drippings. The vegetables caramelize alongside the chicken, soaking up all the savory spices. Serve with a quick squeeze of lemon or a sprinkle of chopped fresh parsley to brighten the dish. Tested three times: once, skin burned (too high heat); another, undercooked near the bone. 425°F, middle rack, is the sweet spot for even cooking and juicy meat.
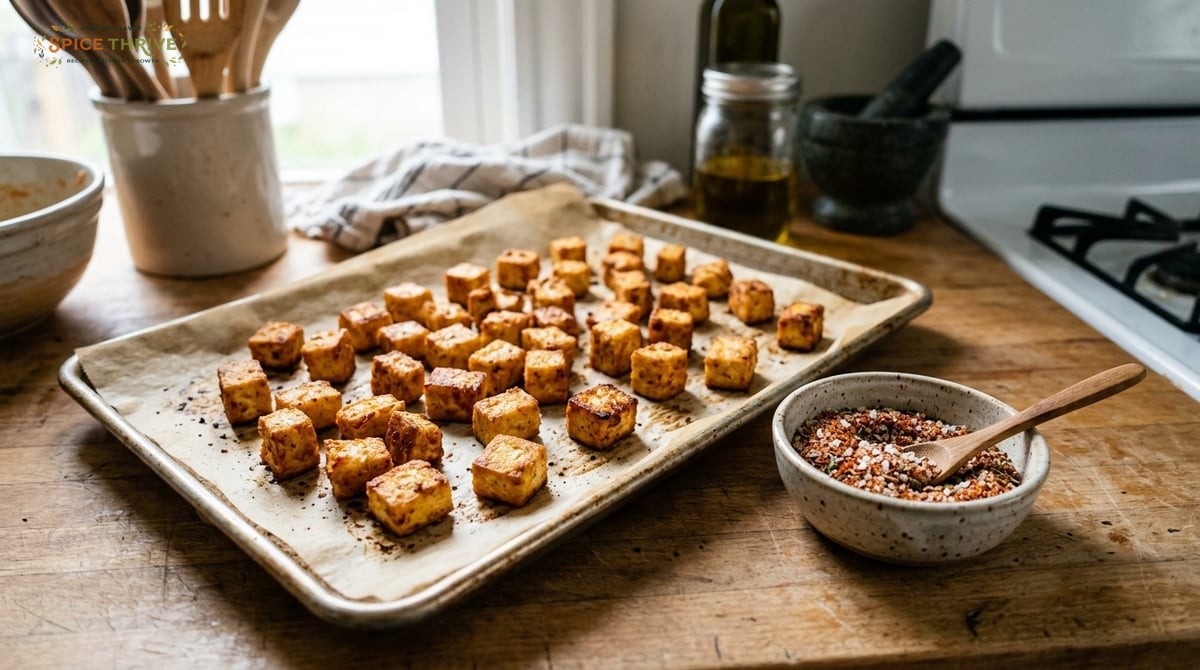
Seasoned Salt Oven-Baked Tofu (Vegetarian/Vegan)
Prep time: 15 min
Cook time: 30 min
Total time: 45 min
Yield: 4 servings
Ingredients:
- Extra-firm tofu – 1 block (14 oz/400g), drained and pressed
- Seasoned salt – 2 teaspoons (7g)
- Cornstarch – 1 tablespoon (8g)
- Neutral oil – 2 tablespoons (30ml)
Instructions:
- Slice tofu into cubes and pat dry with paper towels for maximal crispiness. For best results, use a tofu press or wrap in towels and weigh down for 20–30 minutes to extract as much water as possible.
- In a bowl, gently toss tofu with seasoned salt and cornstarch until evenly coated (the cornstarch forms a thin, tacky layer on the cubes). The thin coating creates a delicate crust during baking. For even more crunch, let the coated tofu sit 5 minutes before oiling.
- Drizzle with oil, tossing until tofu looks glossy but not wet. Use a silicone spatula to gently turn the cubes so they don’t break.
- Arrange in a single layer on a parchment-lined baking sheet. Leave a little space around each cube for best air circulation and golden edges.
- Bake at 425°F (220°C) for 28-32 min, flipping halfway, until cubes are golden brown and crispy on the edges. Serve hot. Excellent with rice bowls, salads, or stuffed into wraps with crunchy slaw and spicy mayo.
I’ve had tofu stick, dry out, and come out bland. The key: press it well, don’t crowd the pan, and use parchment for a golden crust without sticking. Leftovers reheat well in a skillet for quick stir-fries or as a savory salad topping.
Savory Seasoned Salt Cornbread Muffins
Prep time: 10 min
Cook time: 18 min
Total time: 28 min
Yield: 12 muffins
Ingredients:
- Yellow cornmeal – 1 cup (150g)
- All-purpose flour – 3/4 cup (90g; sub gluten-free blend if needed)
- Baking powder – 1 tablespoon (12g)
- Sugar – 2 tablespoons (25g)
- Seasoned salt – 3/4 teaspoon (3g)
- Egg – 1 large
- Milk (or plant milk) – 1 cup (240ml)
- Butter or neutral oil – 1/4 cup (60ml), melted
Instructions:
- Preheat oven to 400°F (200°C). Line or grease a muffin tin. This higher heat guarantees tall muffins and crisp, golden edges.
- Mix flour, cornmeal, baking powder, sugar, and seasoned salt in a bowl. Make sure baking powder is evenly distributed—this ensures even rise.
- In another bowl, whisk egg, milk, and butter/oil. Add wet to dry, stirring just until mixed (lumps are OK). Overmixing can lead to dense, chewy muffins, so fold gently. For extra flavor, fold in 1/2 cup grated sharp cheddar or chopped scallions.
- Spoon into muffin tin. Bake 16-18 min or until the tops spring back and the edges are golden brown. Cool 5 min in pan before transferring to a rack—this helps prevent soggy bottoms.
Serve warm with butter, honey, or even a swipe of jam for a sweet-savory breakfast or snack. These muffins pair perfectly with soups, chilis, or barbecue. First try came out pale and bland. I upped the seasoned salt a little and baked in a hotter oven—the result is soft, fluffy centers with perfectly browned edges.
Pro Tips & Troubleshooting: Getting the Best from Seasoned Salt
- Mix Thoroughly: Homemade seasoned salt can clump if not well mixed. Shake it in a jar or sift before baking for even flavor. If making a large batch, pulse in a food processor for uniformity.
- Taste as You Go: Different brands of salt and paprika vary in intensity. Start light, taste, and add more after baking if needed. For first-time dishes, I always start with half the seasoning and build up.
- Timing with Heat: For meats, season before roasting so flavors infuse. For veggies or fries, add a bit more as soon as they’re hot out of the oven for extra pop. The heat releases essential oils in the spices, blooming the flavor at the finish.
- Parchment is Your Friend: Prevents sticking and makes cleanup far easier for fries and tofu. Silicone mats can work too but may result in slightly less crisp edges.
- Test & Adjust: When tweaking for dietary needs (low-sodium, gluten-free), test a small batch first. Too much salt can be hard to fix, but you can always add a sprinkle after cooking. If a dish is overly salty, stir in more unsalted cooked grains or legumes, or add a splash of unsalted broth to balance.
Every mistake I’ve made with seasoned salt came from overconfidence—so measure, taste, and let your senses guide you. If you overdo it, a squeeze of citrus or splash of yogurt helps balance the saltiness. You can also serve with fresh herbs or raw vegetables for contrast, or fall back on plain rice or bread to round out intensity in a meal.
Variations & Dietary Swaps for Every Kitchen
- Gluten-Free: For the cornbread, swap all-purpose flour for a gluten-free blend (I used Cup4Cup and it turned out fluffy!). You can also make gluten-free oven fries by tossing with rice flour or chickpea flour for bonus crunch.
- Dairy-Free/Vegan: Use plant-based milk and oil in the muffins or tofu. The flavor holds strong. Coconut oil adds a subtle sweetness if you want a different spin, and soy milk keeps the muffins moist with no off-flavors.
- Lower Sodium: Halve the salt in your mix, but amp up garlic and herbs for depth. A dash of nutritional yeast is also a great swap—it brings umami while keeping sodium low.
- Spicy: Stir in cayenne or a dash of chili powder for heat. Try smoked paprika for a smoky edge. Chipotle powder or even Korean gochugaru are fun additions for international flair and gentle heat.
- Global Flavors: Add ground cumin and coriander for a Middle Eastern note, or toss in a pinch of five spice for a Chinese-inspired twist. For a Mediterranean take, crush in dried rosemary or lemon zest; for Mexican-style, swap in ancho chili powder and a hint of cocoa.
- Broader Uses: Sprinkle seasoned salt on popcorn, roasted nuts, savory oatmeal, or even grilled pineapple. It’s fantastic rimmed on cocktail glasses for Bloody Marys, stirred into burger patties, or used as a final flourish on avocado toast.
Storing, Reheating, and Make-Ahead Tips
- Seasoned Salt: Store in an airtight jar in a cool, dry spot up to 6 months. Shake before use to remix spices if they settle. For bulk mixes, label with date and keep out of sunlight to preserve vivid flavors.
- Fries & Tofu: Best fresh but crisp up in a 400°F (200°C) oven for 8-10 minutes. Avoid microwaving for maximum crispiness. You can prep fries ahead: soak cut batons in cold water, drain, dry well, then toss with oil and seasoning just before roasting.
- Chicken: Leftovers keep 3 days in the fridge. Reheat in the oven to revive crisp skin. To freeze, cool fully, wrap tightly, and reheat from frozen at 350°F (175°C) until hot and sizzling again.
- Cornbread Muffins: Store in a covered container at room temp for 2 days, or freeze up to 2 months. Reheat gently in the oven for best texture. If you prefer a toastier edge, split and broil briefly before buttering.
- Make-Ahead: Prep your seasoned salt and chicken a day ahead. Fries and tofu should be roasted before serving for the freshest results. Extra seasoned salt can be portioned into small jars for gift-giving—add a handwritten label with suggested uses for a personal touch.
Let’s Cook Together! Share Your Results
Seasoned salt is one of those kitchen essentials I reach for every week, and I hope these recipes inspire you to make it your own. Everyone’s shaker is a little different, so don’t be afraid to experiment. Tag your kitchen creations with #SpiceThriveKitchen and let me know what twists you tried—especially if you go global or riff on the basics. Your personal touches—like a dash of cumin, smoked garlic, or even a touch of orange zest—might spark new favorites for someone else searching for ideas. For more tested recipes and hands-on kitchen tips, meet me here, and happy cooking!
Common Questions About Seasoned Salt Recipes
Can I use store-bought seasoned salt in these recipes?
Absolutely! Homemade gives you control, but store-bought works in a pinch. Watch the saltiness—some brands are saltier, so taste as you go and adjust as needed.
How can I reduce sodium for dietary needs?
Use less salt in your homemade blend and pump up the herbs and spices. Citrus juice or vinegar after cooking also helps brighten flavors without more salt.
Are these recipes gluten-free and vegan?
The tofu recipe is naturally vegan and gluten-free. For cornbread, use a gluten-free flour blend and plant-based milk/oil. Always double-check your specific ingredients.
What’s the best way to keep seasoned salt fresh?
Store in a tightly sealed jar in a cool, dry place. Avoid dipping in a damp spoon, which can cause clumping. Shake or stir each time you use it.
Can I freeze seasoned salt?
It’s best kept at room temp. Freezing can make it clump and dull the aroma, but the baked dishes (like muffins) can be frozen without issue.
How do I get really crispy fries or tofu?
Press tofu very dry and don’t skimp on oven heat. For fries, cut even batons, dry them before oiling, and space out on the pan for air flow.
This article was created with the help of AI. Images may also be AI-generated.