")
Jump to Recipe & Photo Gallery
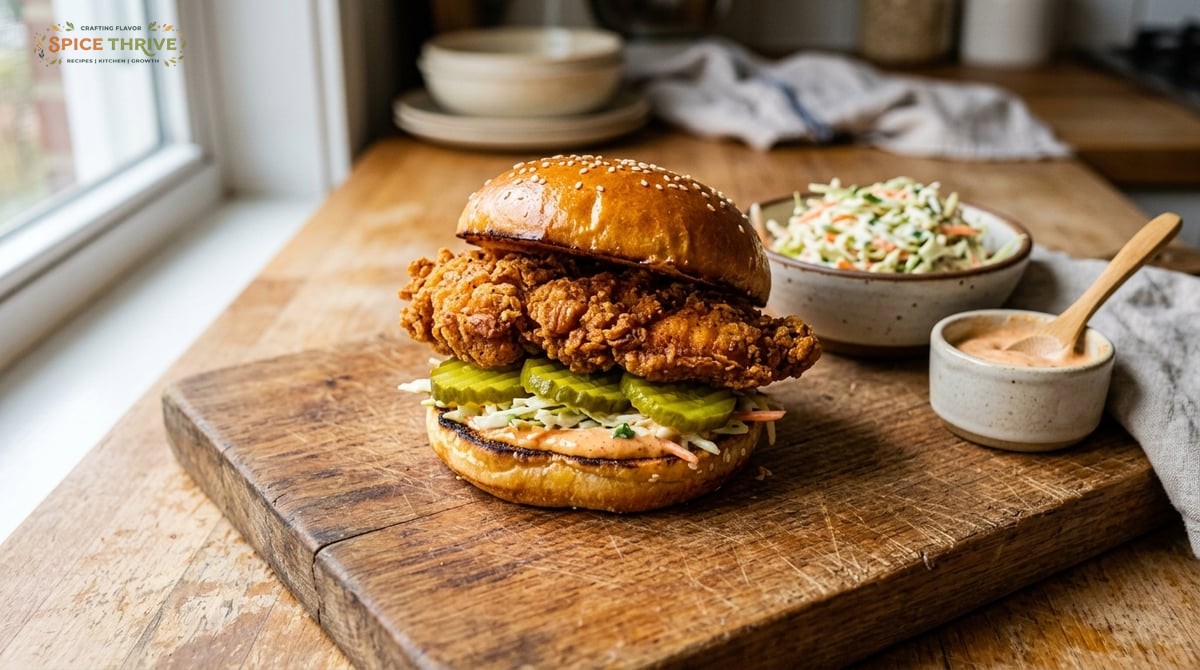
This spicy chicken sandwich became a family favorite after several kitchen experiments, including one dramatic oil splatter and too many soggy buns. Each round taught me something new, from how long to marinate the chicken for real flavor to the perfect ratio of crunch to heat. On more than one occasion, I trialed different marinating times—from 30 minutes to overnight—and found that flavor really seals in after about 2 or more hours. Too little, and the meat lacks depth; too long, and it can actually start to break down. Even the bun choice made a surprising difference: classic burger buns let too much steam through, while pillowy brioche offers that ideal soft-but-structured hold. Moreover, the struggle for the right spiciness was real: I tried chipotle powder, Gochujang, and fresh jalapeños before settling on my signature blend. The result of all these tweaks? This version is crispy, juicy, and fiery enough to please chili heads and spice newcomers alike—no fryer required. Scroll for step-by-step photos and the exact recipe I perfected in my own kitchen. Each tweak along the way led to crispier, juicier, bolder flavor every single time.
Why You’ll Love This Spicy Chicken Sandwich
- Crispy AND Juicy. The chicken stays tender thanks to a buttermilk brine while the double-dip flouring creates a shatteringly crisp crust. Marinating longer (up to 4 hours) lets the buttermilk go to work, breaking down proteins for maximum tenderness. Double-dipping—flour, egg, flour—leaves the surface ultra-textured, almost like professional fried chicken, so every bite crunches.
- Big, Bold Flavor Layers. A blend of cayenne, hot paprika, and chili crunch brings real heat, but it’s balanced by a luscious, cooling slaw and silky spicy mayo. For example, the slaw isn’t just a topping—it physically cools each mouthful, allowing even spice-averse folks to enjoy the sandwich comfortably. Layering flavors with both spice and creamy elements prevents palate fatigue, so the sandwich stays exciting till the last bite.
- Tested for Home Cooks. I made this four times before nailing the right oil temp, spice level, and sandwich build (no more soggy bottoms!). Through trial and error, I discovered that letting freshly fried chicken rest briefly on a wire rack preserves its crunch, and toasting the buns seals them against sog. Each time, I also fine-tuned the spice quantities based on taste testers’ feedback to get a satisfying but not overwhelming heat.
- No Deep Fryer Needed. You can make this in a regular skillet—no need for fancy equipment. A heavy-bottomed cast iron pan works wonders; consistent temperature is easier to maintain, and shallow-frying uses far less oil, reducing cleanup and waste. A simple instant-read thermometer helps you nail the perfect doneness without specialized gadgets.
- Customizable Heat. Spice can be ramped up (add more chilies) or toned down for milder tastes (reduce cayenne, big slaw pile-up). Try tossing in a full teaspoon of crushed red pepper or chopped jalapeño for daring diners, or replace sriracha with ketchup for a kid-friendly version. Adding fresh herbs or even a few drops of honey can tune the heat and complexity right to your taste.
Ingredients & Substitutions (with Notes)
- Chicken Breast or Thighs (2 pieces, about 250 g each): Boneless skinless chicken breasts work for a classic bite, but thighs are more tender and forgiving. Pound lightly to ¾ inch evenness for best texture. If you prefer a slightly fattier, juicier sandwich, opt for thighs—they resist overcooking and absorb marinade better. For a more uniform sandwich, you can butterfly thicker breasts or trim thighs to a rounder shape.
- Buttermilk (1 cup / 240 ml): Tenderizes, adds tang, and helps the breading stick. Substitute: plain yogurt plus a splash of milk or plant-based milk for dairy-free. If you don’t have buttermilk, try mixing 1 tablespoon of lemon juice or vinegar into whole milk and let it sit for 5 minutes—it curdles slightly and mimics the tangy effect.
- Spices for Marinade (see full list in recipe below): Cayenne, hot paprika, garlic powder, onion powder, salt, pepper. This builds deep flavor right into the chicken. Experiment with variations—a pinch of smoked paprika gives a BBQ note; cumin or coriander adds earthiness; or a dash of chili oil amps up the heat.
- All-Purpose Flour (1.5 cups / 190 g): For the crispy coating. Gluten-free flour blend works well for GF. For extra cragginess, try mixing in a tablespoon of semolina or finely crushed cornflakes to the flour. These create rugged edges that get extra crisp when fried.
- Cornstarch (1/2 cup / 65 g): Gives extra crunch to the crust. Cornstarch slows browning slightly, helping your chicken cook through before the outside gets too dark. In a pinch, potato starch or rice flour can work for a similar effect, especially in gluten-free versions.
- Egg (1 large): Adds structure and helps breading adhere. For egg-free variations, a couple of tablespoons of aquafaba (liquid from canned chickpeas) can work as a vegan substitute, keeping everything sticking through frying.
- Oil for Frying (2 cups / 500 ml, neutral like canola or grapeseed): Choose something with a high smoke point. Peanut or sunflower oil are other good choices. Stay away from olive oil, as it can impart off flavors and smokes at lower temps.
- Spicy Mayo (1/3 cup / 80 g mayo, 1–2 tbsp sriracha, 1 tsp lemon juice, pinch sugar): Creamy, tangy, and hot. Vegan mayo is fine. Add a squeeze of fresh lime or a teaspoon of hot honey for extra tang and complexity. Adjust spice by tasting; you want zip but not overpowering fire.
- Brioche Buns (2 or 4, halved and toasted): Lightly sweet, pillowy, and slightly buttery. Burger buns or potato rolls substitute well. Toasting (either in a skillet with a dab of butter or under the broiler) is essential—un-toasted buns soak up juices too quickly and collapse.
- Pickles & Slaw: Adds acid, crunch, and coolness to balance the heat. Quick slaw: shredded cabbage, carrot, scallion, a splash of vinegar. For a twist, add thin-sliced red onion, poppy seeds, or a touch of sesame oil to the slaw for extra flavor. Classic dill or bread-and-butter pickles both work, depending on your desired sweetness/sourness balance.

Step-by-Step: How to Make the Ultimate Spicy Chicken Sandwich
- Marinate: In a shallow bowl, whisk buttermilk, all marinade spices, and salt. Add chicken, toss to coat well, and chill for 1–4 hours (minimum 30 minutes). The chicken should look creamy and well-bathed in marinade. The longer marinating time allows flavors and moisture to penetrate deeply, especially for thicker pieces. For extra flavor, gently pierce the chicken pieces several times before soaking so the marinade seeps in.
- Prep Dredge Station: Combine flour, cornstarch, and dredge spices in a wide shallow dish. Beat the egg in a second bowl. Lift the chicken from the marinade, allowing excess to drip off, then coat it fully in flour mixture, dip into egg, and return to flour. Press so the coating sticks—look for a rough, sandy texture. The unique double-dipping breads the exterior generously, which creates those addictive crispy ridges. For gluten-free versions, the process works the same—just sub in a 1:1 blend.
- Fry: Heat 2–2.5 cm (about 1 inch) oil in a heavy skillet to 180°C/350°F. Fry chicken one at a time if needed—3–4 minutes per side, until deep golden brown and internal temp hits 75°C/165°F. Transfer to a rack (not paper towels!) to keep crisp. The sizzle should be lively but not explosive; if smoking, lower heat slightly. If you notice dark spots, flip more frequently or gently swirl in the pan for even browning. Keeping batches small prevents temperature drops and ensures each piece cooks evenly inside and out.
- Make Sauce: Stir together mayo, sriracha, lemon, and sugar. Adjust chili to taste. Should be creamy, orange-pink, and have a slight tangy aroma. Taste and tweak—sometimes a pinch of smoked salt or a few drops of hot sauce make all the difference.
- Slaw & Buns: Toss cabbage mix with vinegar and a pinch of salt until just wilted. Toast buns in a dry skillet, cut side down, until golden and fragrant. For extra flavor, add a few drops of sesame oil or a sprinkle of fresh herbs (cilantro, chives) to the slaw. Toasting the buns forms a barrier against the chicken’s juices, keeping every bite fluffy rather than soggy.
- Assemble: Spread spicy mayo on both bun halves. Add slaw, then place chicken on top. Pile on pickles. Top with remaining bun—press gently and listen for that crunch! Try serving with extra mayo or a dash of hot sauce on the side. For a crispy finish, some cooks even return the assembled sandwich to a hot skillet for 30 seconds, grilling the outside and melting flavors together.
Pro Tips from Testing (and How I Fixed My Mistakes)
- Spice Level Surprises: On my first try, the cayenne overpowered everything. Dial it back for kids or sensitive tongues—taste the marinade before using. Remember, heat accumulates with each component: between the marinade, the flour dredge, and the sauce, things can escalate quickly. Consider splitting the batch—one portion with regular spice, one mild, for diverse palates.
- Crust Falling Off? It happened to me! Double-dipping in flour and letting the breaded chicken rest for 10 minutes before frying helps lock it all in. The resting period allows the coating to hydrate and stick, creating a unified crust that won’t slide off when you bite. In hot, humid weather, chilling breaded chicken in the fridge briefly (up to 30 minutes) also boosts adhesion.
- Oil Temperature Drama: If your oil isn’t hot enough, you’ll get greasy chicken. Use a thermometer. Aim for 180°C/350°F and adjust heat between batches. After a few sandwiches, bits of coating can accumulate in the oil and drop the temperature—scoop them out with a slotted spoon for best results. If in doubt, add a pinch of flour: if it sizzles immediately, you’re good to fry.
- Soggy Buns: Rest fried chicken on a rack, not paper towels! Toast the buns too—this makes a huge texture difference and prevents sog. Another pro tip: if you have extra time, let the chicken rest for 2 minutes between frying and assembling, so it’s piping hot but not steaming (which softens the bun).
- Troubleshooting Overflow: Don’t overcrowd your pan. Fry one at a time if needed for even color and crunch. Overcrowding drops the oil temp and produces unevenly cooked or greasy results. If scaling up for a group, keep the oven on warm and stash finished chicken on a wire rack to maintain that crunch for serving.
Variations & Dietary Swaps
- Gluten-Free: Swap in gluten-free 1:1 flour blend and double-check your buns and cornstarch source. Same crunch, no gluten. Check labels for hidden gluten in seasonings and sauces. Gluten-free buns often toast faster, so monitor closely to prevent burning.
- Dairy-Free: Sub buttermilk with unsweetened soy or oat milk plus 1 tsp apple cider vinegar or lemon juice. Use vegan mayo in the sauce. In testing, oat milk with vinegar yielded the closest texture to classic buttermilk for moist, flavorful chicken. If you are sensitive to soy, look for a pea-protein-based vegan mayo for assembling.
- Vegetarian/Vegan: Try cauliflower steaks or firm pressed tofu instead of chicken. Increase marinating time and avoid over-frying to keep veggies juicy. Coat tofu or cauliflower with the same dredging method, and use aquafaba instead of egg. For an extra kick, marinate tofu overnight; for cauliflower, par-steam before dredging for a tender bite beneath all that crunch.
- Add-Ons: Layer in kimchi, jalapenos, or a drizzle of honey. Explore global slaws (like gochugaru-spiked Korean cabbage or Thai herb slaw). Avocado slices, pepper jack cheese, pickled onions, or even a fried egg are delicious variations. Swapping classic pickles for spicy or bread-and-butter versions changes the overall flavor profile dramatically.
- Mild Version: Halve the cayenne and swap hot sauce for sweet chili sauce in the mayo. You can also up the fresh slaw for even more cooling contrast (a few slices of cucumber work wonders). Incorporate herbs like dill or mint in the slaw for extra refreshment when spice is dialed down.
Storage, Reheating, and Make Ahead
- Storage: Store leftover fried chicken separately in an airtight container in the fridge (up to 2 days). Keep buns and slaw separate for best texture. If you’ve made extra slaw or spicy mayo, keep those in covered containers; they also make great toppers for wraps or salads the next day.
- Reheating: For crispness, reheat chicken in a 180°C/350°F oven or toaster oven for 8–10 minutes. Skip the microwave—it’ll go soft! For added crunch, you can spritz the chicken with a touch of oil before reheating. Leftover chicken is also tasty cold, sliced on a green salad or wrapped up in a tortilla for a quick lunch.
- Make Ahead: You can marinate the chicken (covered) up to 24 hours in advance or bread and chill it for up to 2 hours before frying. Spicy mayo and slaw hold well in the fridge (shop-bought pickles last for weeks). If preparing for a party, fry chicken shortly before guests arrive and keep it warm on a rack in the oven at low heat until ready to assemble.
- Freezing: The breaded, uncooked chicken can be frozen on a tray (then transferred to a bag). Fry from frozen—add 1–2 minutes per side, checking for doneness. To protect the coating from freezer burn, wrap prepped pieces in parchment before bagging. Fried, cooled chicken also freezes well; re-crisp in the oven right from frozen—great for meal prepping a crowd-pleaser dinner.
Printable Recipe Card & Allergen Notes
Prep time: 25 minutes
Cook time: 15 minutes
Total time: 40 minutes (plus marinate)
Yield: 2–4 sandwiches
Ingredients:
• 2 boneless chicken breasts or thighs (250 g each)
• 1 cup (240 ml) buttermilk
• 1.5 cups (190 g) all-purpose flour
• 1/2 cup (65 g) cornstarch
• 2 large eggs
• 2 cups (500 ml) neutral oil
• 1/3 cup (80 g) mayo
• 1–2 tbsp sriracha
• 1 tsp lemon juice
• Spices: 1 tsp each cayenne, hot paprika, garlic powder, onion powder, salt, and black pepper
• 2–4 brioche buns, toasted
• Pickle slices; 1 cup (100 g) slaw mix
• 1 tbsp vinegar (for slaw)
Instructions:
- Marinate chicken in buttermilk and half the spices for 1–4 hours. For max flavor, pierce chicken pieces gently before marinating so the liquid seeps in.
- Mix flour, cornstarch, and remaining spices. Dredge chicken, dip in egg, and dredge again. For an extra-crunchy crust, press the chicken firmly into the flour mix both times and shake off excess gently before frying.
- Heat oil in a skillet to 180°C (350°F). Fry chicken 3–4 minutes per side, till golden and cooked through. Don’t overcrowd; fry one at a time for even browning and crisp results. Use a thermometer for oil and chicken to avoid overcooking or undercooking.
- Mix mayo, sriracha, and lemon juice. Toss slaw with vinegar. Taste and adjust hot sauce or lemon to fit your spice preference. The slaw should have a fresh crunch and a good zing.
- Toast buns. Assemble with spicy mayo, slaw, chicken, and pickles. For even more flavor, add extra pickles or a sprinkle of fresh herbs just before closing the sandwich. Serve immediately for best texture.
Nutrition estimate/serving: 560 cal, 28g protein, 47g carbs, 31g fat
Allergens: Contains gluten, eggs, and possibly soy (in mayo); see dietary swaps above. If you are sensitive to other allergens, ensure store-bought buns and mayo are safe for you—some brands include unexpected traces of nuts or seeds.
Recipe tested and photos by Lydia at Spice Thrive. Updated June 2024 after four home trials for perfect crisp and flavor. For more classics, check out my crispy oven-fried chicken or homemade burger buns recipes! If you double this batch, keep finished pieces hot on a wire rack in the oven, so you can serve a crowd with ease and none lose their crunch.
Ready to Spice Up Your Own Sandwich?
I love seeing how these sandwiches turn out in your kitchen—each one a little different and definitely all delicious! If you try this recipe or make your own twist, leave a comment below or tag @spicethrive on Instagram. For more real-tested recipes, hit subscribe and let’s keep growing together. Happy cooking! And if you have a favorite sandwich creation, snap a photo and share your unique topping combo—cooking is all about making every recipe your own.
Common Questions
Can I bake or air fry the chicken instead of frying?
Yes! Bread as directed, spray lightly with oil, and bake at 220°C/425°F for 20–25 minutes (flip halfway) or air fry at 200°C/400°F for 12–14 minutes for a lighter crust. To keep the breading crispy, avoid overcrowding on the sheet or basket, and let pieces rest on a rack after cooking.
What’s the best way to make it less spicy for kids?
Reduce or skip the cayenne, use sweet paprika, and serve extra slaw. You can also swap sriracha for ketchup in the mayo. Piling on pickles and slaw adds coolness as a buffer against residual heat.
How do I keep the chicken moist inside?
Marinate for at least 30 minutes and don’t overcook. Pull from oil as soon as internal temp hits 75°C/165°F. If using breasts, pound them evenly for uniform cooking and juicier results.
What can I use if I don’t have buttermilk?
Use plain yogurt thinned with milk or a plant-based milk mixed with 1 tsp lemon juice or vinegar. For added tang, even a tablespoon of sour cream whisked into milk works in a pinch.
Can I make this ahead for a party?
Yes! Fry the chicken up to 2 hours ahead and re-crisp in the oven on a rack at 200°C/400°F for 6–8 minutes. Assemble sandwiches just before serving. Toast buns fresh for best results, and keep slaw and sauce chilled until assembly.
Any nut, egg, or soy allergens to watch?
The base recipe contains eggs (for dredging) and possibly soy (in mayo/oil). For egg-free, try aquafaba instead of egg wash. Always check product labels for cross-contamination. Many store-bought buns are produced in facilities with seeds or nuts; choose allergen-safe brands if needed.
This article was created with the help of AI. Images may also be AI-generated.

