NY Strip Steak Roast: My Family’s Sunday Showstopper
Every Sunday growing up, my dad would pull a beautifully marbled NY strip steak roast out of the fridge, set it on the counter, and let the magic begin. We’d gather around the kitchen, sneaking pinches of seasoning and anticipating that first slice—crusted on the outside, rosy and juicy in the middle. Making this roast myself now, I still feel that bit of excitement. It took several tries to nail down my version—my first attempt was underdone, the next too salty, but with a few tweaks (and lots of test dinners) I landed on a method that never fails.
There’s something about a NY strip steak roast that brings out the best in simple, quality ingredients and — with just a bit of confidence — turns an ordinary Sunday into an event. Even on days when the weather kept us indoors and the world felt still, that sizzle and aroma signaled comfort and celebration. Over time, this ritual taught me more than just technique; I learned patience waiting for the resting period, attention to detail in trimming silver skin, and even the power of a kitchen timer to avoid under- or overcooking. These lessons always make the meal feel special, even before the first slice is carved.
Whether you’re new to roasting or looking for a perfect centerpiece, this NY strip steak roast is a celebration of simple technique and bold flavor. And yes, I’ve got in-process photos from my own kitchen for you every step of the way.
Why You Will Love This NY Strip Steak Roast
- Consistently Juicy Results: The reverse-sear technique ensures even doneness and a fork-tender bite, with no grey ring. By roasting gently and finishing with a sear, you get edge-to-edge pinkness and a texture that resists drying out. Even if your oven is quirky, this method is forgiving—just keep your thermometer handy.
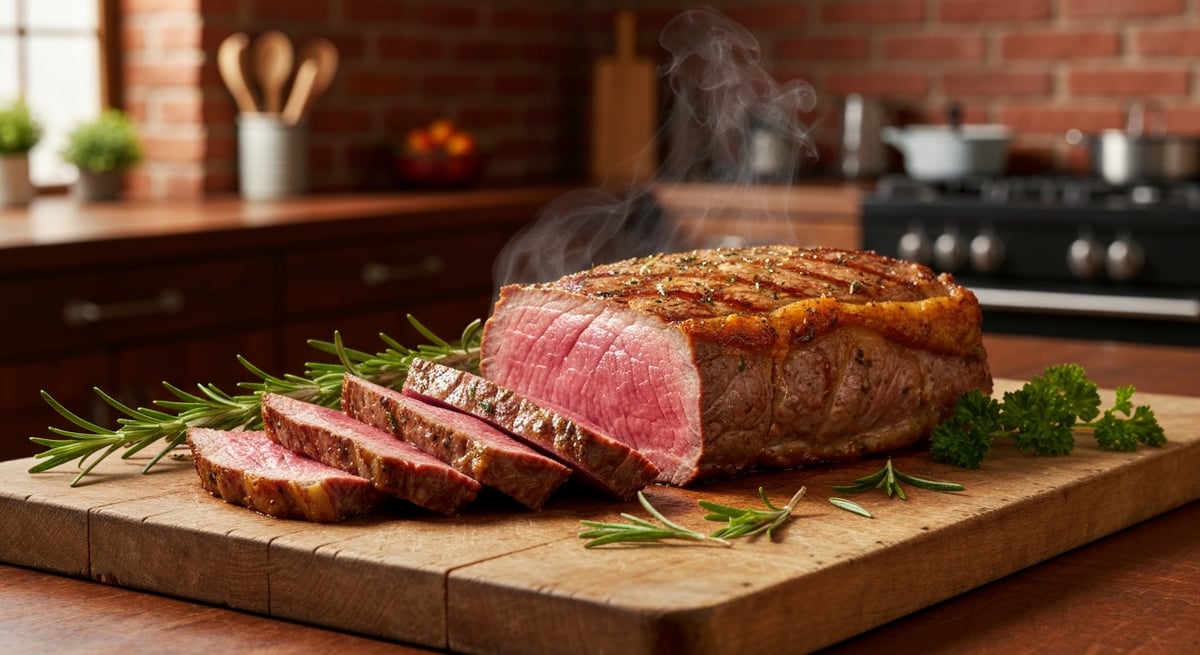
- Sensory Perfection: Expect a deeply caramelized crust, a rich, beefy aroma, and slices that melt in your mouth. The Maillard reaction—the browning that happens during a hard sear—locks in flavor, while fragrant herbs like rosemary and garlic infuse the fat cap, making every slice fragrant and savory. The sizzle when you hit the pan with butter is an experience to savor.
- Foolproof Even for Beginners: I’ve tested—and photographed—every step, highlighting visual cues and timing tips, so you don’t need pro chef skills. If you can measure salt and watch a thermometer, success is in reach. Even if you’re nervous about big cuts of meat, the step-by-step approach takes the guesswork out, and I’ve included cues for what everything should look and even smell like at each stage.
- Flexible Seasonings: While I love mine with garlic, rosemary, and smoked paprika, I’ll show you easy swaps for every taste. If you prefer herbes de Provence or want to play up a smoky BBQ vibe, the method adapts seamlessly, making it easy to customize for holidays, casual gatherings, or meal prepping for the week.
- Meal Prep and Entertaining Friendly: This roast holds well for make-ahead, reheats beautifully, and turns leftovers into incredible sandwiches or salads. The even slices are perfect for lunchboxes or next-day grain bowls. I often slice any extras extra-thin for steak salads or pile them on toasted sourdough with a swipe of horseradish cream for indulgent sandwiches.

Ingredients & Notes (with Swaps)
- NY Strip Steak Roast: 1 whole roast, about 3 lbs (1.4 kg). Ask your butcher for a well-marbled strip roast (boneless, sometimes called strip loin). A fat cap provides extra flavor—don’t trim it all off. Look for a roast with fine marbling (small streaks of intramuscular fat); this fat will keep the roast moist while rendering just enough for an incredible crust. If you can only find bone-in, you can use it—just adjust your cooking time by adding 10-20% to account for the bone.
- Kosher Salt: 2 tbsp (30g). Seasoning deeply flavors the roast. Table salt is fine, but use less (1.5 tbsp). Kosher salt with large crystals is ideal for even distribution. If using a flavored salt (like smoked salt), reduce the quantity by a pinch to avoid overpowering the beef’s inherent flavor.
- Freshly Ground Black Pepper: 2 tsp (5g). For a peppery bite; freshly cracked tastes best. If you love heat, try tellicherry peppercorns for a fruitier kick, or white pepper for a subtler flavor. Always grind just before using to maximize aroma and impact.
- Smoked Paprika (optional): 1 tsp (2g). Adds subtle warmth and color. Sweet paprika works too for a milder result, and hot paprika for a touch of spice. Smoked paprika imparts a barbecue-like essence, especially helpful if you don’t have access to a grill. You can also try chipotle powder or ancho chili powder for earthiness.
- Fresh Garlic: 4 cloves, crushed (15g). Brings depth; sub with 1 tsp (2.5g) garlic powder as needed. If you want extra punch, try grating the garlic to create a paste—it will caramelize more deeply during searing.
- Fresh Rosemary: 2 tbsp, finely chopped (5g). Earthy aroma. Thyme or dried herbs are good swaps. If using dried herbs, cut the amount in half since they’re more potent. Chives or marjoram are also delicious for a springlike twist. If using herbs with woody stems like rosemary or thyme, strip the leaves and chop finely to prevent burning during the sear.
- Olive Oil or Neutral Oil: 2 tbsp (30ml). For searing; avocado or canola oil work too. Choose an oil with a high smoke point—neutral oils will highlight the taste of beef, while olive oil can add subtle fruitiness. If you want more flavor, try a light drizzle of toasted sesame oil or even beef tallow with the butter during the final sear.
- Butter: 3 tbsp (42g). Optional, but basting in the final sear adds a lush, golden finish. Omit for dairy-free. The milk solids in butter brown quickly, creating nutty, aromatic notes within seconds during basting. For a twist, infuse the butter with smashed garlic or extra herbs as it melts. Clarified butter (ghee) is another option for a higher smoke point.
Step-by-Step NY Strip Steak Roast Instructions
- Dry-Brine the Roast: Pat the roast dry with paper towels and rub all over with kosher salt. Let it sit uncovered on a rack in the fridge for at least 8 hours or up to 24 hours (overnight is best). The meat should feel tacky, a sign the salt is working its magic. This step helps the salt penetrate deeply, seasoning all the way through while drawing out excess moisture for a perfect crust. Some people rush this phase, but patience ensures that the salt not only flavors but also tenderizes, resulting in juicier meat. The rack is key—it allows air to circulate, drying the exterior and maximizing browning potential.
- Bring to Room Temp: Pull the roast out of the fridge an hour before cooking. It should lose its chill for even roasting. Letting it sit, loosely covered, encourages more reliable heat absorption when it hits the oven. A cold roast straight from the fridge may cook unevenly, with a cool center and overcooked outer edges, so don’t skip this step. While it rests, excess surface moisture evaporates, so your sear won’t steam.
- Season: Rub the roast evenly with black pepper, smoked paprika, garlic, and rosemary. Drizzle with olive oil, massaging the seasonings into every nook. Don’t be afraid to get your hands dirty, making sure the flavor gets into every fold and crease. If your roast has a fat cap, work some seasoning just beneath it for even more flavor. At this point, you can also tie the roast at 1–2 inch intervals with butcher’s twine, especially if it’s unevenly shaped; this promotes uniform cooking and that classic roast look.
- Roast Low and Slow: Preheat your oven to 250°F (120°C). Place the roast bone-side (or fat-side) up on a rack in a roasting pan. Roast until internal temperature hits 120°F (49°C) for medium-rare, about 1.5 to 2 hours, depending on thickness. The roast should look dry on the outside but feel springy inside. If your oven tends to run hot, check doneness 15 minutes early. Insert the thermometer from the side toward the center for the most accurate reading. Avoid opening the oven too often as this loses heat and slows cooking. For larger roasts or if you’re aiming for a different doneness, adjust the final temperature accordingly—pull at 125°F (52°C) for medium, or 110°F (43°C) for rare.
- Rest: Move the roast to a board, tent loosely with foil, and rest 20-30 minutes. Juices will redistribute and texture improves. Skipping resting causes flavorful juices to flood out when slicing. A good rule of thumb: the larger the roast, the longer the rest. Use this time to finish your side dishes or prepare sauces.
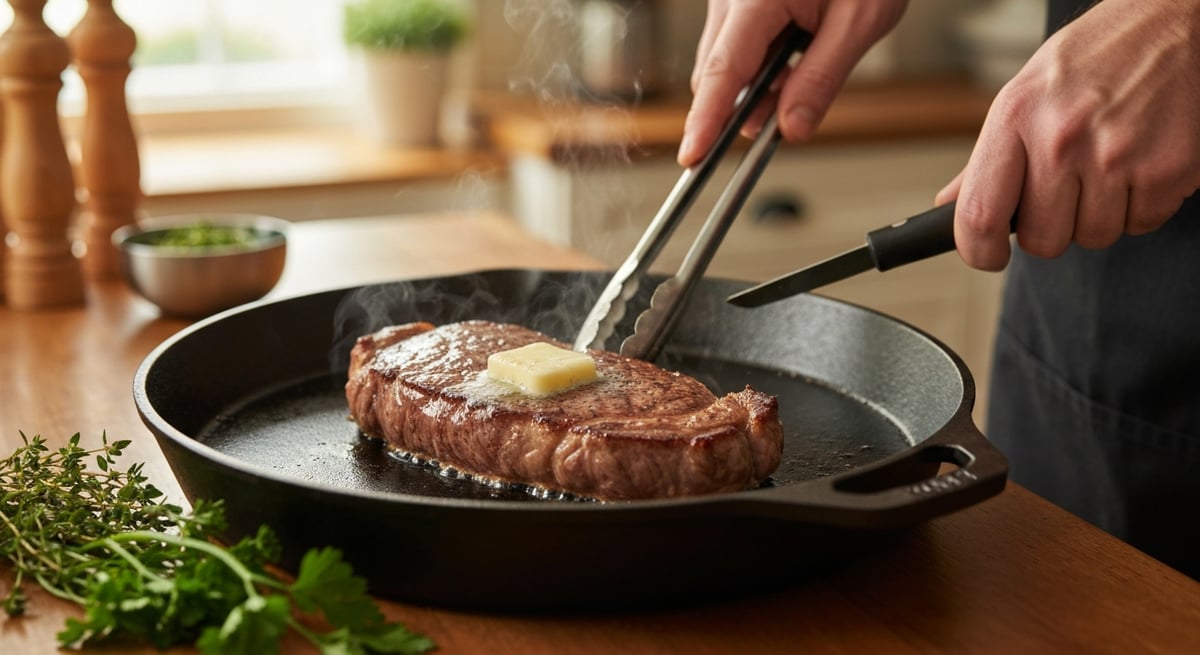
- Reverse Sear: Heat a heavy skillet over high. Add a swirl of oil, then sear roast on all sides for 1-2 minutes each, until a deep brown crust forms. Add butter and baste for the last 30 seconds (optional, but gives shine and flavor). The basting step rapidly develops extra flavor, as the hot fat helps brown all edges. Don’t overcrowd the skillet and use tongs to rotate quickly for an even crust. If you’re searing in the oven’s broiler (as an alternative), give each side 2–3 minutes undisturbed.
- Slice and Serve: Always slice across the grain for maximum tenderness. Serve with drippings or a splash of finishing salt. If serving guests, cut thick steakhouse-style slices; for sandwiches, slice thinly and against the grain. Drizzle with any pan juices or melted butter for added richness. A sprinkle of flaky salt at the table brings out the beef’s flavor.
Test Kitchen Notes: Tips, Troubleshooting & Lessons Learned
- Under-roasting: My first try looked perfect outside but was chilly in the center! Use a probe thermometer—don’t just go by time. Letting it rest before the hot sear helps ensure heat spreads gently. To avoid this, always push the thermometer into the thickest part (not touching fat or bone). If your roast is unusually thick, expect it to take longer and trust your thermometer over the clock. If you don’t have a probe thermometer, consider investing in one—it’s a roast’s best friend and prevents expensive mistakes.
- Too-Salty Crust: Kosher salt is less salty by volume than table salt. If you swap them, reduce the amount, or the crust can get overwhelming. If you accidentally over-salt, you can sometimes brush off excess seasoning before roasting or pair slices with a creamy sauce to balance flavors. Remember: you can always add more at the table, but you can’t take it away.
- Pale Crust: If your crust isn’t browning, be brave and heat that pan until shimmering before searing. Drying the meat and using a little oil are both key. Cast iron skillets work best, but a heavy stainless pan also does the job. Don’t move the roast around too soon—let each side develop color undisturbed. If searing in batches (say with two smaller roasts), give each plenty of space so steam doesn’t sabotage the crust.
- Don’t Skip Resting: Rushing to slice releases puddles of juice. Give it time—your patience pays off with juicier slices. A proper rest makes the difference between slices that are succulent versus dry. If you’re worried about losing heat, know that the reverse sear quickly brings it back to serving temperature.
- Leftovers: Turns out, chilled slices make incredible steak sandwiches the next day. I recommend it! Try them with peppery arugula, horseradish mayo, or even warmed in a quesadilla. For salads, cube leftover roast and add alongside blue cheese, walnuts, and roasted vegetables for a hearty meal.
Variations & Dietary Swaps
- Herb-Swapped: Try thyme, oregano, or even a touch of cumin for an earthier twist. For an asian-inspired flavor, rub with ground ginger, soy sauce instead of salt, and a little brown sugar. You can also add a hint of coriander seed for a more aromatic, citrusy profile. Going for a Mediterranean vibe? Use lemon zest, crushed fennel seed, and oregano. These swaps allow you to match the roast with almost any cuisine or side dish.
- Dairy-Free: Skip the butter finish, or use a quality plant-based spread. Some cooks love using olive oil or even a touch of beef tallow during searing for rich flavor without dairy. Vegan butters that brown well will replicate that classic crust and aroma. Always check labels to ensure the spread has a high smoke point if you sear at high temperatures.
- Gluten-Free: This recipe is gluten free by default—just double-check that your spices aren’t blended with flour or fillers. Some commercial spice blends include anti-caking agents or flour, so read ingredient lists carefully. If assembling a spice rub, choose single-ingredient herbs and spices to stay safe and allergen-free.
- Vegetarian Adaptation: While the focus is beef, you can use these seasonings and method for roasting thick slices of king oyster mushrooms or roasted cauliflower steaks. You’ll get deep browning and a similar flavor profile for plant-based eaters. Roasting portobello mushroom caps or large slabs of jackfruit are also great options. The reverse sear approach gives these vegetables an umami-rich, meaty crust—serve them as steaks or sandwich them on grilled sourdough for a hearty main.
- Spice Level: Add a pinch of cayenne or Aleppo pepper for gentle heat without overtaking the beef’s flavor. If you crave more complexity, experiment with smoked chipotle powder or a dash of Szechuan peppercorn. Always sprinkle the spice after the dry-brine but before roasting for best adhesion and flavor development.
Storage, Reheating & Make Ahead Tips
- Make Ahead: Roast up to 48 hours ahead. Cool completely, then wrap tightly and refrigerate. Sear just before serving for a freshly crisped crust. For a dinner party, this means minimal last-minute stress—simply sear and slice right before guests sit down. Wrapping tightly prevents fridge odors from affecting the roast.
- Leftovers: Slice the leftover roast and store in an airtight container. It’ll keep for 4 days chilled, or freeze up to a month in portions. If freezing, wrap slices in parchment before sealing in a freezer bag for easier thawing and to prevent sticking. Thin slices warm faster and retain tenderness.
- Reheating: For best results, reheat slices in a skillet over medium with a spoonful of beef broth or drippings, just until warmed through. Microwaving can toughen the meat, but it’s fine for sandwiches mixed with sauce or mayo. For added moisture, cover the skillet with a lid briefly. If you want to keep the crust, use a hot cast iron pan and don’t crowd the slices.
- Freezer Notes: Frozen slices thaw well in the fridge overnight. Briefly re-searing restores some crust and flavor. For whole leftover portions, wrap tightly in foil and reheat in a 300°F (150°C) oven until just warmed through, then finish with a hot skillet sear for that fresh-cooked taste. Label and date frozen portions so you always know what’s on hand.
Printable Recipe Card: NY Strip Steak Roast
NY Strip Steak Roast (Tested Strip Loin Roast)
- Prep Time: 15 minutes active (+8-24 hours rest)
- Cook Time: 2 hours
- Total Time: About 2 hours 30 minutes
- Yield: 8 servings
Ingredients
- 1 NY strip steak roast (about 3 lbs / 1.4 kg)
- 2 tbsp (30g) kosher salt
- 2 tsp (5g) black pepper
- 1 tsp (2g) smoked paprika (optional)
- 4 cloves garlic (15g), crushed
- 2 tbsp (5g) chopped rosemary
- 2 tbsp (30ml) olive oil or neutral oil
- 3 tbsp (42g) butter (optional)
Instructions
- Pat roast dry. Rub salt all over. Rest on rack, uncovered, in fridge 8-24 hours. Use a rimmed baking sheet lined with a wire rack, and don’t cover—this air exposure dries the surface for optimal browning. If time’s short, a 2-3 hour dry-brine still improves results, but flavor won’t penetrate as deeply.
- Remove from fridge 1 hour before cooking. Preheat oven to 250°F (120°C). An oven thermometer ensures accuracy—some ovens run hotter or cooler than their settings.
- Rub with herbs, garlic, pepper, paprika, and oil. Press seasonings firmly for full coverage—keep a paper towel nearby for clean hands.
- Place on rack in roasting pan. Roast until 120°F (49°C) internal (1.5-2 hours). Begin checking temperature at the shortest suggested time if your roast is on the lighter side, and let the thermometer sit for a few seconds to register fully. If aiming for a different doneness, see notes above for temperature targets.
- Tent with foil and rest 20-30 minutes. You should see a slight glisten on the surface—this is moisture returning where it belongs.
- Heat skillet to high. Sear on all sides (1-2 min each), basting with butter last 30 seconds. If you don’t have a skillet large enough, cut roast into two big pieces. Turn the roast with tongs so each side develops a crust—don’t forget the narrow edges for an evenly browned look.
- Slice across grain and serve. For party platters, fan the slices; for sandwiches, slice thin. Add a sprinkle of flaky salt and spoon over any juices from the cutting board.
Estimated Nutrition (per serving)
Calories: 375, Protein: 36g, Fat: 24g, Carbs: 1g
Allergens
- Gluten Free
- Dairy Free option (omit butter)
- No eggs or nuts
Ready to Roast? Share Your Best NY Strip Moments!
I hope this recipe brings you all the fun (and irresistible aroma) that a strip steak roast always brings my kitchen. Did you try a twist or serve it for a special occasion? Let me know in the comments—and don’t forget to tag your photos on Instagram so I can see your roast in action. For more kitchen-tested classic roasts, read more about Spice Thrive here and check out my other comfort favorites. Happy roasting!
Author: Jamie Lin – Home cook, recipe developer, Spice Thrive founder. See more on my About page.
Common Questions About NY Strip Steak Roast
What’s the difference between a NY strip and a ribeye roast?
A NY strip roast is leaner, with dense marbling and a beefier flavor, whereas ribeye is richer and fattier. Both roast well, but strip stays firmer and slices evenly. Ribeye, with more internal fat, can sometimes shrink more during roasting but delivers a softer, almost buttery mouthfeel. For a crowd, NY strip often yields tidier, uniform slices; ribeye is prized for decadence and richness.
How do I know when my roast is done?
Always use an instant-read thermometer. For medium-rare, pull at 120°F (49°C); for medium, 130°F (54°C). The temperature will rise as it rests, landing at 130-135°F (54-57°C) for perfect pink slices. The probe should be inserted into the center at the thickest point—avoid touching bone or large pockets of fat for accuracy.
Can I use this recipe for smaller or individual NY strip steaks?
Absolutely. Adjust roasting time down to 25-40 minutes for 1-inch steaks, then rest and finish with a hot sear as outlined. The reverse sear works beautifully on single steaks: lower oven temp for evenness, then blast them in the skillet for an unbeatable crust. For thinner steaks, check doneness after 20 minutes.
Is this recipe safe for people with gluten or dairy allergies?
Yes. Omit butter for dairy-free. There’s no gluten as long as your spices and seasonings are certified gluten free. Always check your labels. Use separate utensils and pans if cross-contamination is a concern, and opt for single-ingredient dried spices where possible.
Do I need to tie the roast?
Most NY strip roasts hold together well due to their dense structure, but if yours looks uneven, tie every 1-2 inches for uniform cooking. This not only helps with appearance but ensures even heat penetration, important for the perfect doneness edge-to-edge. Regular kitchen twine is best—avoid anything dyed or synthetic.
This article was created with the help of AI. Images may also be AI-generated.