Ezekiel Bread with Sprouted Grains: My Story and Baking Journey
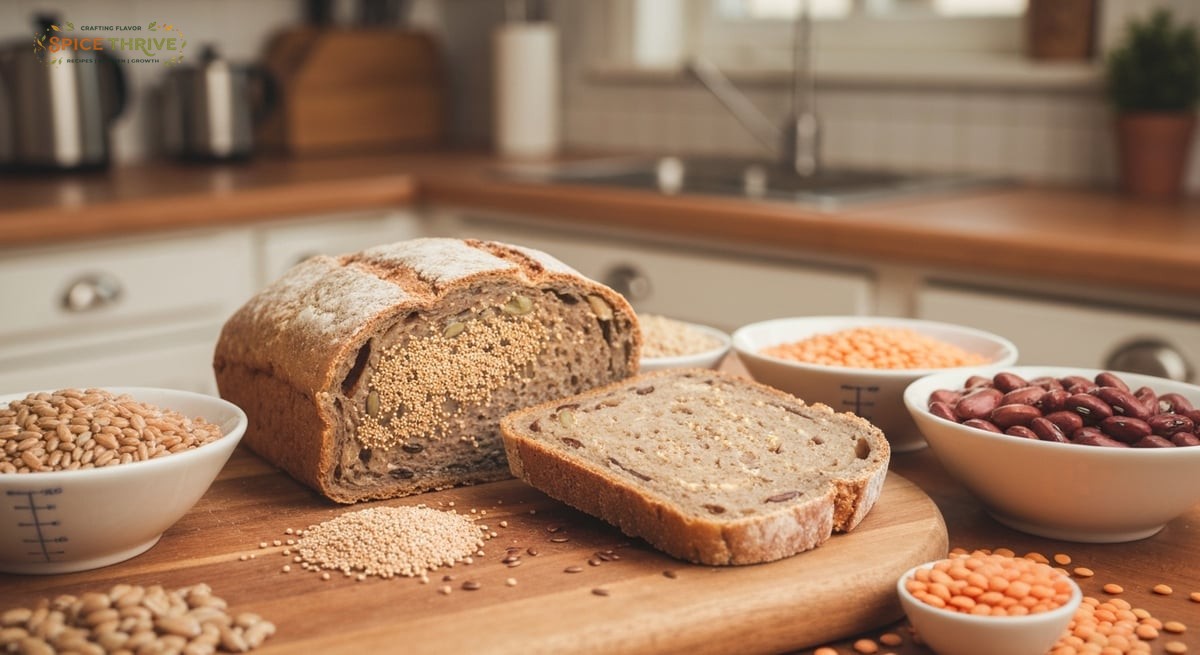
About a year ago, I baked my first loaf of Ezekiel bread with sprouted grains, inspired by memories of woodsy-smelling loaves from a tiny health food store my aunt took me to as a kid. My first try was dense and far from the golden, nutty slices I remembered. But that failure only sharpened my curiosity about the science of sprouting: why did those loaves taste different—fuller, deeper, more alive? I was determined to get it right—a dozen tests later, I had dialed in sprouting times, hydration, and baking temperature for a loaf that’s nutty, slightly sweet, and wonderfully chewy. Along the way, I read about the legacy behind Ezekiel bread: its inspiration in biblical bread recipes, the ancient practice of naturally fermenting grains to boost nutrition and digestibility, and why hearty ingredients matter in modern diets. For me, recreating that bakery-style bread at home was a journey of learning to trust my senses—the texture of the dough, the smell of sprouting grains, even the particular golden crust color that told me it was ready. I’m sharing my real process with step-by-step photos, easy-to-understand instructions, and all the practical lessons I picked up along the way—including what went wrong and how to fix it. Let’s make a naturally wholesome, bakery-style Ezekiel bread together, and find out just how satisfying sprouted bread can be.
Why You’ll Love This Ezekiel Bread Recipe
- Deep, wholesome flavor: Sprouted grains and seeds lend a rich, earthy taste you can’t get from basic whole wheat bread. Every bite is complex, slightly sweet, and toasty. What makes sprouting special is that it unlocks subtle flavors hidden in each grain—the barley gives a light maltiness, the wheat delivers nuttiness, and lentils provide delicate earthiness. Toasted slices develop an especially irresistible aroma, with hints of fresh hay and maple.
- Chewy, hearty texture: The crumb is moist yet sturdy, with a touch of chew thanks to the mix of grains and beans. No dry, crumbly slices here. Unlike white sandwich bread, Ezekiel bread has bite—you’ll notice a rustic, uneven crumb perfect for hearty sandwiches or slathering with nut butter. The seeds and millet add pops of crunch in each mouthful, making the eating experience uniquely satisfying.
- Tested for the home kitchen: After baking this recipe more than 10 times, I’ve adapted the hydration and baking method for easy success—even if it’s your first time working with sprouted grains. The dough is forgiving—minor adjustments are easy, and it doesn’t require special equipment. This means you can master bakery-quality results even in a small apartment kitchen.
- Versatile and customizable: Use your choice of sprouted grains or seeds, swap sweeteners, and make it dairy-free or vegan easily. Many readers have swapped barley for rye, or added extra ground seeds for more fiber, and the recipe works. Personalization can include turning the bread into sandwich rolls or an oblong boule—Ezekiel dough shapes well and adapts to different pans.
- Feels like real connection to food: From soaking the grains to shaping the final loaf, it’s a hands-on recipe that feels grounding and special. Sprouting the grains yourself may take extra time, but it offers a tactile, almost meditative ritual—watching hard, dry seeds come alive and transform into wholesome bread. For families, it’s a great educational project to teach kids how bread evolves from seeds to loaf.
Ingredients and What Each One Does
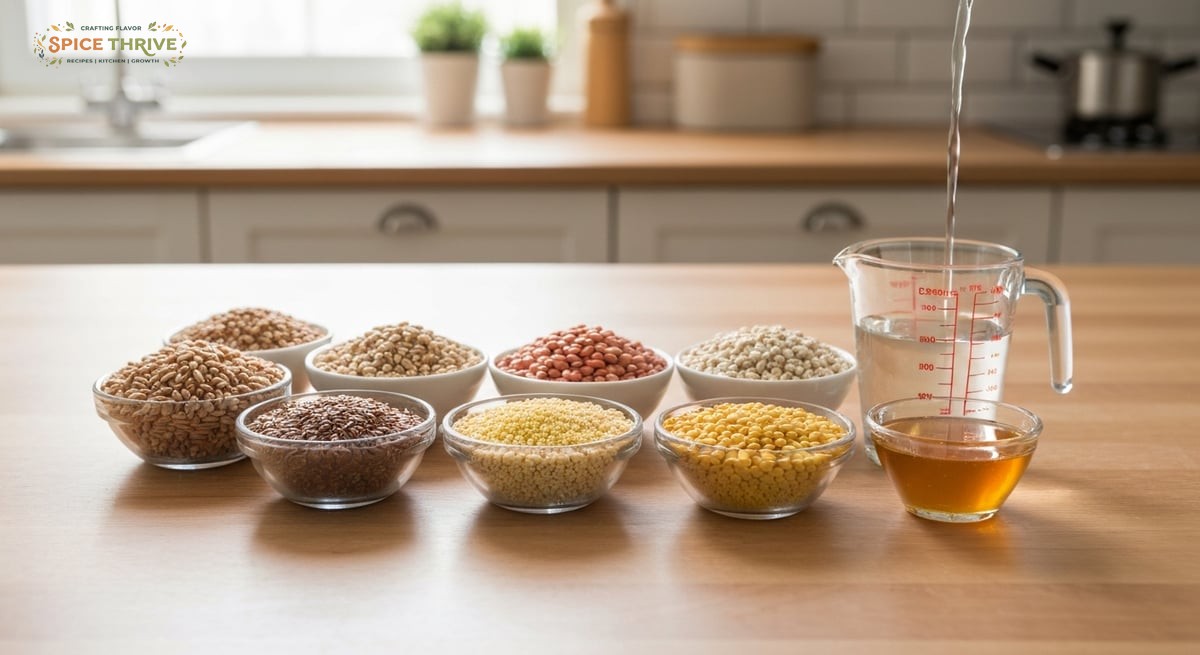
For one standard 9×5-inch loaf (about 12 slices):
- Sprouted wheat berries: 1 cup (185g) uncooked before sprouting. Forms the hearty base, giving nutty flavor and chewy texture. Sprouted wheat is also easier to digest and has slightly increased levels of certain vitamins, such as B vitamins.
- Sprouted spelt berries: 1/2 cup (90g) uncooked before sprouting. Adds mild sweetness and extra protein. Spelt contributes a tender crumb and has a spicier, caramel back-note that sets this loaf apart from ordinary whole wheat bread. If you’re sensitive to modern wheat, spelt is sometimes easier on digestion for some people.
- Sprouted barley: 1/3 cup (60g) uncooked before sprouting. Gives a malty, subtly sweet finish. Barley’s beta-glucans add moisture and help with shelf life (your bread won’t go stale quickly). Its unique flavor builds complexity you’ll taste in each toasted slice.
- Dry lentils: 1/4 cup (50g) uncooked. Helps with moisture and boosts protein. Lentils bring a mellow flavor but also contribute soluble fiber, which supports a hearty, sliceable loaf. Green or brown lentils both work.
- Dry beans (great northern or navy): 1/4 cup (45g) uncooked. More protein, a bit of creaminess—soak and sprout with the grains. Beans make this bread more filling and give it a softer interior without dairy or eggs. Navy beans give a slightly sweeter flavor while great northern beans blend in for neutral support.
- Millet: 2 tablespoons (20g). Adds light crunch and color. Tiny millet seeds also contribute magnesium and keep the crumb interesting—not gummy or flat.
- Ground flaxseed or chia seed: 2 tablespoons (14g). Binds the dough and helps with rise. As natural gel-formers, they support loaf structure and give a subtle nutty undertone. Omega-3s are a bonus.
- Warm water: 1/2 to 3/4 cup (120–180ml). Adjust as needed for moisture. Sprouted grains naturally absorb water differently depending on climate and hydration—start low and add as you knead for a perfect texture.
- Honey or agave: 2 tablespoons (30g). Encourages browning and subtle sweetness. Honey also feeds the yeast, leading to a lighter crumb, while agave provides a clean, neutral flavor for vegan loaves.
- Salt: 1 1/2 teaspoons (8g). Brightens flavor and controls yeast. This small amount sharpens the taste and prevents over-fermentation.
- Instant yeast: 2 teaspoons (7g). Reliable rise for hearty dough. Hearty, dense doughs need a little boost—instant yeast delivers a steady, strong fermentation without requiring a sponge or pre-ferment.
Swaps: Use only wheat or spelt if you can’t find all grains. Gluten-free: swap wheat/spelt/barley for sprouted buckwheat and certified GF oats, but expect a denser result. Vegan: use agave instead of honey. Optional flavor boosters: try adding 1/2 teaspoon cinnamon or a tablespoon of seeds (sesame, sunflower) for variety.
Step-by-Step: How to Make Ezekiel Bread with Sprouted Grains
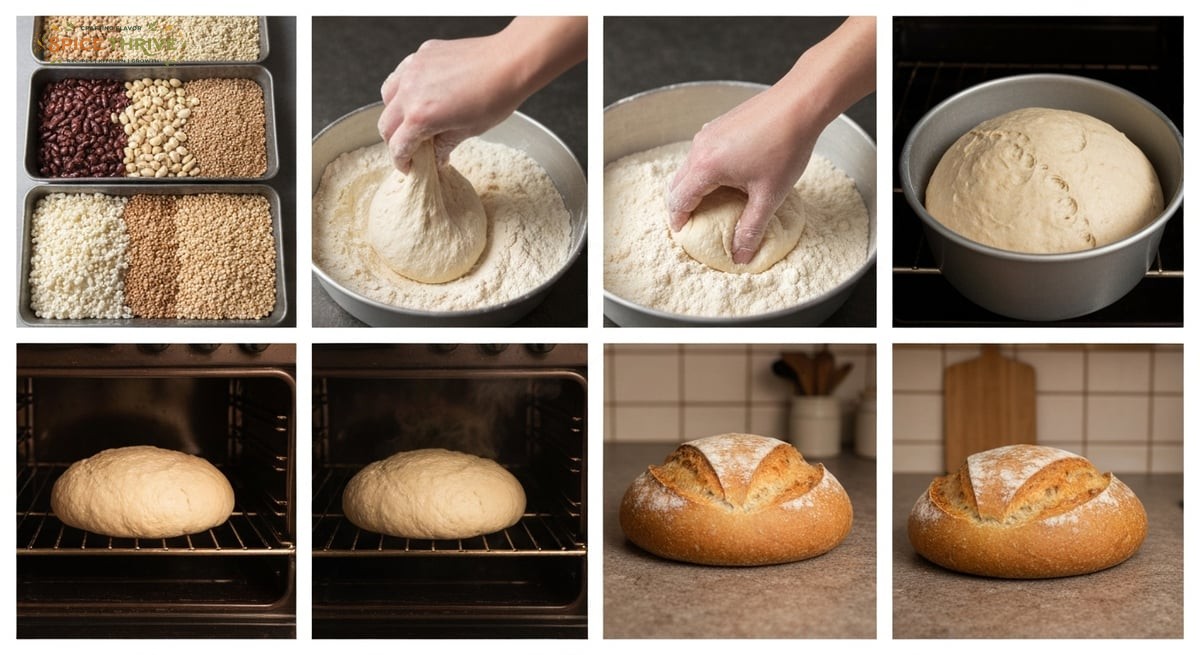
- Soak and sprout grains and beans: Rinse wheat, spelt, barley, lentils, and beans well to remove dust and debris, then cover in fresh water and soak overnight (10-12 hours). This pre-soak softens the grains and “wakes them up” for sprouting. Drain, then spread on a clean tray, dish towel, or in a sprouting jar, and keep at room temperature. Rinse and drain twice daily for 2–3 days until small tails appear (1/8 to 1/4 inch). Well-sprouted grains have a slightly sweet, grassy smell and no visible slime.
(See photo: sprouted grains on a tray with visible shoots) For best results, make sure the environment isn’t too warm (which encourages spoilage) or too cool (which slows down sprouting). In dry climates, cover your tray with a damp cloth to keep humidity up. - Grind the sprouted mix: Pulse sprouted grains, beans, and millet in a food processor until chunky-smooth—think oatmeal texture, not a fine paste. Don’t over-process; leaving a bit of texture makes the bread hearty. If you lack a processor, use a meat grinder or finely chop with a large knife, but try to keep the pieces small so the loaf holds together.
- Mix the dough: In a large mixing bowl, combine the ground grains with flaxseed, yeast, salt, and honey/agave. Gradually add warm water as you gently stir to create a shaggy mass. The dough should be tacky but scoopable, not pourable or stiff. With wet hands, knead 5–7 minutes—dough will feel springy and sticky at first, then start to pull together in a loose mound. Add tiny splashes of water as needed; sprouted grains can be thirsty. Note: Kneading can be done in the bowl since dough is stickier than flour-based loaves.
- First rise: Cover with a damp towel or plastic wrap and let rise in a warm spot until puffy and slightly risen, about 1–1.5 hours. Unlike typical yeasted doughs, expect a modest rise—about 30% in volume. If your kitchen is chilly, set the bowl atop a barely warm oven or near a heating pad to help it along.
- Shape and second rise: Scrape the dough into a greased 9×5-inch loaf pan. Don’t worry if the mixture is loose; smooth the top with wet hands or a silicone spatula to create an even surface. Cover and let rise again, about 45–60 minutes, until the loaf is just cresting the edge of the pan. This slow second rise helps develop flavor and a gentle, open crumb. If you want to add a sprinkle of seeds to the crust, do so now and gently press them in.
- Bake: Bake at 350°F (175°C) for 45–50 minutes, until deep golden on top and loaf sounds hollow when tapped. A thermometer inserted in the center should read at least 200°F (93°C). If the top browns too quickly, tent lightly with foil in the last 15 minutes. Rest in pan 10 minutes, then cool fully before slicing—the aroma will be toasty and nutty, and the crust crisp. Bread will finish setting as it cools, and slicing too soon can make it gummy inside.
Lessons from My Kitchen: Troubleshooting & Pro Tips
- Sprout timing: Too-short sprouts make the loaf dense. Too-long can lead to sour flavors or spoilage. I once let mine go four days, and the dough barely rose. Stick to tails just beginning to show—2–3 days. If you live somewhere humid, mold can appear quickly—check your grains daily for any off smells or visible fuzz, and start over if this happens.
- Dough texture: If the dough is too wet, the loaf will sag. If it’s too dry, it won’t rise enough. Err on the side of tacky! I found lightly oiling my hands made shaping much easier. Wet hands help, too. If you accidentally add too much water, sprinkle in a bit of ground oats or whole wheat flour (just a tablespoon at a time) to bring the dough together. The final dough should feel tacky, not soggy.
- Rise patience: Sometimes the bread rises slowly—especially in colder kitchens. I learned to give it the time it needed and even placed it near a slightly warm oven (turned off) to help the process. Resist the urge to rush—let the natural fermentation develop flavor. Covering with a slightly damp towel prevents a dry crust from forming during longer proofs.
- Slicing: Let the bread cool completely before slicing. The structure sets as it cools—cut too soon, and you get gummy slices. I found overnight cooling made the best texture. For even, café-style slices, use a sharp serrated knife in long strokes without pressing down; thick, sturdy slices are perfect for toast or loaded sandwiches.
- Beans and lentils: Make sure they’re well-cooked in the sprouting and grinding process. Whole pieces will make the bread uneven and lumpy. If your food processor can’t break them down fully, try soaking them 2 hours longer, or pulse with a tablespoon of the warm water before mixing into the dough. Even small, soft pieces blend better for a consistent texture.
Variations and Dietary Swaps
- Grain substitutions: Use all wheat if spelt and barley are unavailable, or try rye for a more robust flavor. For gluten-free, use sprouted buckwheat and certified gluten-free oats (expect a much denser bread). Rye grains (if sprouted) impart earthy tang and a hearty crumb—just reduce water by a tablespoon and monitor dough stickiness.
- Seed and nut options: Fold in 1/4 cup sunflower seeds, pumpkin seeds, or chopped walnuts for crunch and extra nutrition at the final mixing step. Toasted seeds sprinkled on the crust before baking add visual appeal and an aromatic finish; for nut-free, use pepitas or extra millet for the same crunch.
- Sweetener swaps: Maple syrup or coconut sugar both work if you want to skip honey or agave. Molasses yields a darker loaf and deep flavor, especially for fans of old-school wholegrain breads. Adjust the amount to taste—some prefer their loaf barely sweet, others with a breakfast-bread richness.
- Vegan: Use agave or maple syrup instead of honey—otherwise, the base recipe is naturally vegan. If substituting, keep in mind that maple has a strong flavor while agave is mild and blends in; both will encourage a good rise.
- Dairy-free: This recipe is already dairy-free as written, and you don’t have to use any milk or butter for a tender loaf. The combination of sprouted grains and seeds keeps it moist and soft, even after several days.
- Allergy notes: Contains gluten and may contain traces of soy (if using some lentil or bean varieties). Omit nuts if avoiding tree nuts. For strict allergen control, rinse all grains and legumes thoroughly before sprouting to prevent cross-contact.
Storing, Reheating, and Make-Ahead Tips
- Storing: Ezekiel bread keeps well at room temperature in a bread bag or wrapped in a towel for up to 3 days. For longer storage, slice and freeze; pull out slices as needed. Avoid plastic bags unless fully cooled—the crust can soften or encourage mold. Leftover bread also makes fantastic French toast or bread pudding after several days.
- Reheating: Toast slices directly from frozen, or warm whole pieces in a low oven (300°F/150°C) for 7–10 minutes. This revives the crust nicely. For a freshly baked feel, a quick mist of water on the crust before reheating can restore crispness even after freezing.
- Make-ahead: Sprout grains and freeze them (after draining), then thaw and proceed with mixing and baking when ready. You can also mix the dough, refrigerate overnight (up to 18 hours), then do the final rise and bake the next day. This cold fermentation deepens the flavor and allows you to fit fresh bread into a busy week. If freezing sprouted grains, label bags with date and grain mix for easy prep later.
- Freezer notes: Ezekiel bread freezes beautifully—wrap tightly to prevent freezer burn. Slices thaw quickly in a toaster or at room temp. I often cut a fresh loaf in half: keep one out for eating, and freeze the other for next week. Crumbs or stale ends can be blitzed into breadcrumbs for breading or meatless loaf recipes.
Printable Recipe Card: Ezekiel Bread with Sprouted Grains
Ezekiel Bread with Sprouted Grains
Prep time: 3–4 days sprouting, 30 min active | Cook time: 50 min | Total time: ~4 days, 1 hr 20 min | Yield: 1 loaf (12 slices)
Ingredients:
- 1 cup (185g) wheat berries (uncooked, before sprouting)
- 1/2 cup (90g) spelt berries (optional, sub all wheat)
- 1/3 cup (60g) barley (optional, sub all wheat)
- 1/4 cup (50g) lentils
- 1/4 cup (45g) great northern or navy beans
- 2 tbsp (20g) millet
- 2 tbsp (14g) ground flaxseed or chia seed
- 2 tsp (7g) instant yeast
- 1 1/2 tsp (8g) salt
- 2 tbsp (30g) honey or agave (or maple syrup)
- 1/2 to 3/4 cup (120–180ml) warm water, as needed
Instructions:
- Soak and sprout grains and beans for 2–3 days until tails appear. Rinse/drain twice a day. For best nutrition, keep grains in a well-drained, well-ventilated container and avoid direct sunlight—humid, covered spaces can spoil sprouts fast. Proper sprouting brings subtle sweetness to your loaf.
- Pulse sprouted mixture in a food processor until chunky-smooth—aim for a thick, sticky mash with visible grain flecks. If your processor is small, work in batches for even texture.
- Mix in large bowl with yeast, salt, honey, ground flax. Slowly add water for a tacky dough—not soupy. If needed, rest the dough 10 minutes after initial mix to let flax absorb moisture and help binding before final knead.
- Knead by hand 5–7 minutes; cover and rise until puffy (1–1.5 hours). Kneading is sticky—keep hands damp or oiled for comfort. If dough is slow to rise after 2 hours, move to a warmer spot and check yeast freshness.
- Scrape into a greased loaf pan; rise until just above rim (45–60 min). For a dramatic, rustic look, sprinkle the top with extra grains or seeds before baking.
- Bake at 350°F (175°C) for 45–50 min. If unsure about doneness, check for a firm crust and an internal temp of 200°F/93°C. Cool, then slice—waiting at least 1 hour prevents gummy slices.
Nutrition estimate (per slice, 1/12): 120–130 calories, 5g protein, 0.5g fat, 25g carbs. High fiber. Contains gluten and may contain soy or legumes.
Baking Bread, Finding Connection
Baking Ezekiel bread from scratch is a little project, but I promise, nothing beats the pride (and aroma) of that first hearty, golden loaf. If you’ve never worked with sprouted grains before, don’t worry—I’ve made all the mistakes so you don’t have to. Start small: try sprouting a single grain or legume and make a mini batch to practice kneading the sticky dough. The sight of sprouted wheat and barley coming together, rising and scenting your kitchen with toasty aromas, is its own reward. Sharing your homemade Ezekiel bread can be a conversation starter—neighbors and family members may be surprised at the flavor difference compared to store-bought bread. If you give it a go, leave a comment or tag Spice Thrive on social media so we can see your homemade masterpiece!
Hungry for more soulful, from-scratch bread recipes? Explore my Soft Whole Wheat Challah and Homemade Pita Bread for your next baking adventure. Tackling sprouted bread is the first step to developing intuition for grain-based baking. With time, you’ll recognize dough readiness by touch, and every loaf will reflect a little more of your own style and the unique stories in your kitchen.
Common Questions About Ezekiel Bread With Sprouted Grains
Can I use all-purpose flour instead of sprouted grains?
You can, but it won’t have the same flavor or nutritional qualities. The spirit of Ezekiel bread is in the sprouting—if using flour, try to use at least some freshly milled whole grains. Without sprouted grains, the bread lacks complexity, chew, and the signature nutrition boost.
Why is my dough not rising much?
Sprouted grains provide less gluten structure than flour, so rise is gentler. If it’s very sluggish, check your yeast and make sure grains weren’t over-sprouted or too wet. If your kitchen is chilly, the rise will take longer—give it more time and check that the grains have not fermented to the point of sourness.
How do I know when the sprouts are ready for bread?
Tails should be just poking out, about as long as the grain itself. Over-sprouting makes the dough sour or heavy. Ideally, grains should look plump and smell fresh—avoid using if they seem musty, slimy, or have any foul odor.
Is this recipe gluten-free?
Traditional Ezekiel bread contains gluten (wheat, spelt, barley). For gluten-free, use sprouted buckwheat and certified gluten-free oats, knowing it will be denser. You may also want to add a tablespoon of psyllium husk to help bind gluten-free versions.
Can I make this recipe without a food processor?
It’s much easier with a processor, but you can chop by hand or use a meat grinder. The finer the mash, the better the bread holds together. Manual chopping will work for smaller test loaves; be patient and chop thoroughly.
How do I keep the bread from being gummy?
Cool the loaf completely before slicing. Underbaking or too much moisture can also contribute—make sure to measure water carefully and bake until the loaf feels firm and hollow. If in doubt, let cool overnight before slicing; the crumb will set and slice more cleanly.
This article was created with the help of AI. Images may also be AI-generated.