Making Bread from Sourdough Discard: My Cozy Solution for Leftovers
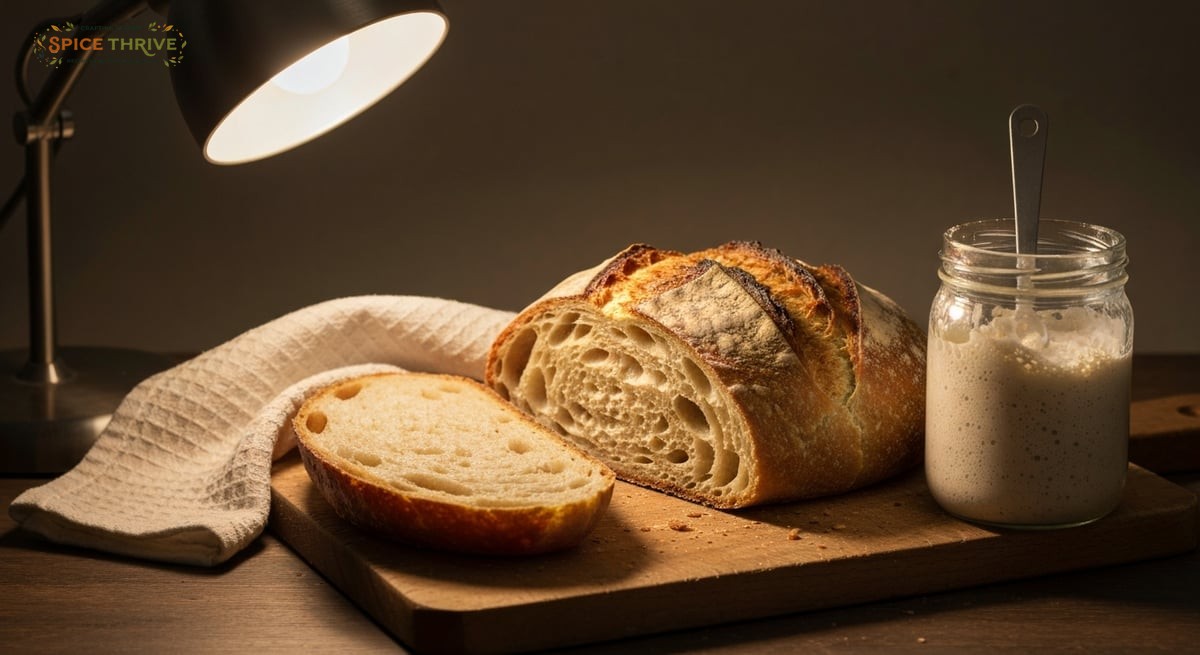
If you keep a sourdough starter on your countertop, sooner or later you’ll have a jar full of that slightly tangy, bubbly discard. For years, I hated tossing it—but I couldn’t find a bread recipe that was truly satisfying. After a lot of trial and error (at least five serious test rounds in my own kitchen!), I finally landed on this rustic sourdough discard bread recipe. It’s now the loaf I bake on busy weeknights or anytime I want warm, crusty bread without babysitting a dough for twelve hours. We love it for grilled cheese, topped with chili crisp, or simply ripped with butter—especially when the kitchen fills with that toasty, golden brown aroma.
Why This Sourdough Discard Bread Works
- No Waste: You get a flavorful, satisfying loaf while using up that extra sourdough discard—no guilt, no tossing. If you bake regularly, you may accumulate a surprising amount of discard; this bread is a genuinely rewarding way to make sure none of that precious tangy starter goes to waste, and it’s a small but tangible change toward reducing kitchen waste overall. Even half a cup per feeding adds up fast, so a go-to recipe helps lighten your environmental footprint while keeping things delicious.
- Beginner-Friendly: No fancy shaping, no complicated scoring, and you don’t need a full sourdough rise. This recipe is forgiving, even if you’re new to baking. The method fits easily around busy days: you mix, knead, rise, and bake without any advanced techniques or equipment. Many readers have shared that this was their first ever homemade loaf, and success came on the first try!
- Rich, Tangy Flavor: The discard adds a beautiful depth—slightly tangy with those wild sourdough notes, but mellow enough to suit any topping. It’s more flavorful than classic white bread, but not as sharply sour as a full sourdough. This means it pairs just as well with jam at breakfast as it does with garlic butter beside dinner.
- Quick(er) Rise: We use instant yeast alongside the discard, so you get lift and softness in a couple of hours, not an all-day affair. Even on cold or humid days, the addition of yeast ensures a reliably tall loaf—whereas natural sourdough alone can sometimes be unpredictable, especially if your starter has been sluggish. This hybrid approach delivers wonderfully airy texture without the stress.
- Flexible Dough: This dough can handle add-ins like herbs, cheese, or seeds, and is easy to work with at home even in a small kitchen. You don’t need special baskets or stones; whether you use a loaf pan, a baking sheet, or even a cast iron skillet, the results are fantastic. Kids and new bakers can get hands-on without fear of ruining the batch, making it a fun project for families or anyone wanting to try their hand at home baking.
Ingredients and Smart Swaps: What You Need (and Why)
- All-purpose flour – 3 cups (375g). This forms the backbone of the bread, yielding a tender yet chewy crumb. You can substitute up to 1 cup (125g) with whole wheat or bread flour for more flavor and texture. For a nuttier flavor and a heartier bite, try mixing in some rye or spelt. If using bread flour, expect a slightly higher rise and chewier texture due to the extra gluten.
- Sourdough discard – 1 cup (240g), bubbly or flat. Adds the signature tangy goodness and moisture. Works best at room temperature; any age discard is fine as long as it’s not moldy or fully separated. Older (refrigerated) discard will give you a stronger aroma, while younger discard is milder. If you keep your discard in the fridge, let it sit out for 30 minutes; cold starter can slow your dough rise.
- Warm water – 3/4 cup (180ml), around 100°F. Hydrates the dough—adjust slightly if using whole wheat, which absorbs more water. Too much water? The dough may spread instead of rising, so add by tablespoons until the texture looks right. In drier winter climates, add an extra splash; in summer, start with a little less and add as needed. The goal: a sticky but shape-holding dough that isn’t soupy.
- Instant yeast – 2 tsp (7g). Gives the bread a reliable lift, so you aren’t reliant on your starter’s rising power. Active dry yeast works too, just proof it first in the water. For maximum reliability, check your yeast’s expiration date and store extras in the fridge to prolong shelf life. If your yeast doesn’t foam when proofed (for active dry), it’s best to use a fresh packet.
- Salt – 2 tsp (10g). Crucial for flavor; fine sea salt blends in perfectly. Avoid iodized table salt if possible, as it can sometimes impart bitterness. Kosher salt also works—just increase slightly as its flakes are less dense than fine salt.
- Sugar – 1 tbsp (12g), optional. Helps with browning and softens the flavor, but you can skip for a more savory loaf. Brown sugar or honey can substitute for added depth; just reduce the amount to 2 tsp (10g) if using something sweeter, like maple syrup. A pinch of sugar will help the yeast activate if your kitchen is chilly.
- Olive oil – 2 tbsp (26g). Adds tenderness and a delicate depth; swap for melted butter or leave out for a firmer, rustic crust. For a richer crumb, try a neutral oil like sunflower, or go classic with unsalted butter for a hint of sweetness. Asian sesame oil adds a lovely aroma for a fusion flavor—perfect if you enjoy savory toppings like scallion cream cheese.
Step-by-Step: How to Make Sourdough Discard Bread
Step 1: Mix and Rest
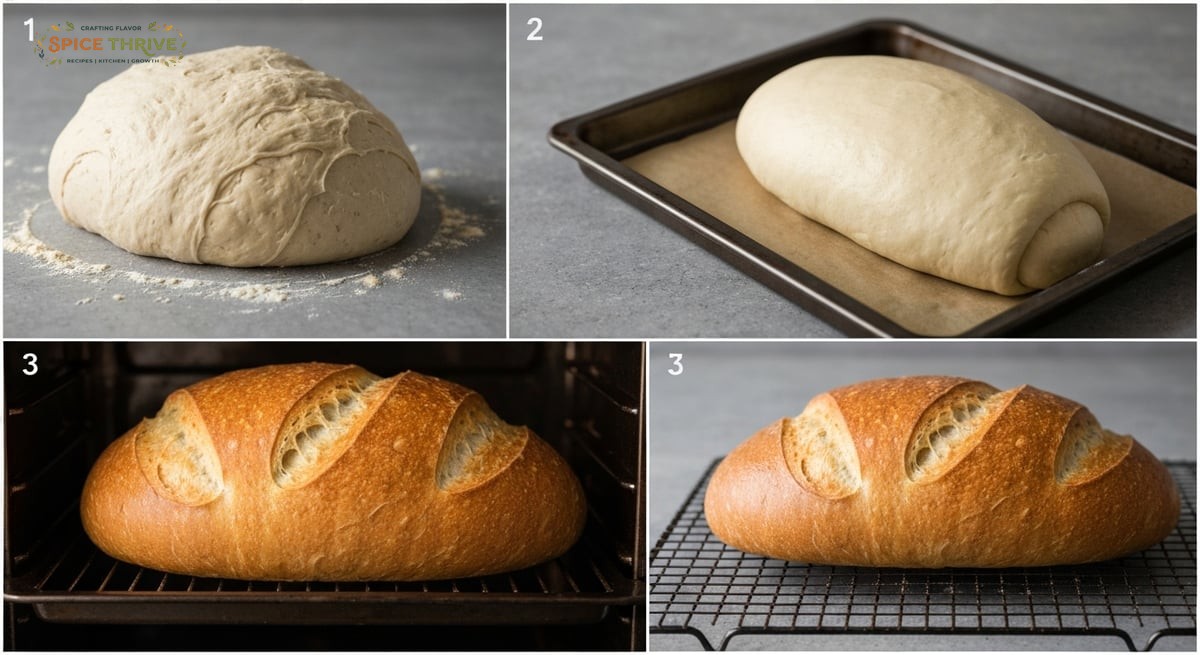
In a large bowl, combine flour, yeast, salt, and sugar. Whisk to distribute. Add the sourdough discard, warm water, and olive oil. Mix with a sturdy spatula or your hand until a scraggly dough forms. It should feel soft, sticky, and slightly shaggy (like thick pancake batter—see my photo, taken right after mixing). Cover and let rest 10-15 minutes to allow the flour to hydrate. This resting step (called “autolyse” in artisan baking) gives the gluten a head start, resulting in a softer, easier-to-handle dough. Even a short rest helps the ingredients absorb water more fully—skip it, and kneading can be much messier. If you’re adding herbs, seeds, or cheese, mix them in after the rest for even distribution.
Step 2: Knead and Bulk Rise
Knead the dough by hand or with a mixer for 5-7 minutes, until it’s supple, smooth, and slightly tacky. It should pull away from the sides in one soft, floppy mass but stick to the bottom of the bowl. Shape into a rough ball. Coat the bowl with a bit of oil, cover, and let rise for 60-90 minutes in a warm spot, until doubled and bubbly. For hand-kneading, slap and fold motions work well if you don’t have a stand mixer—just gather the dough, stretch, and fold it onto itself. If your kitchen is cool, the dough will rise slower but develop more flavor; for a boost, set the bowl inside your (turned-off) oven with the light on.
Step 3: Shape and Second Rise
Turn out onto a floured surface. Press gently into a rectangle, then roll or fold into a log. Place in a greased loaf pan or on a parchment lined baking tray. Dust the top with flour or seeds. Cover with a tea towel and let rise 30-45 minutes, until puffed and domed nearly an inch above the rim. For a rustic look, score the top with a sharp knife or scissors. You can also bake this freeform for a round “country” loaf or in a Dutch oven for a thicker crust.
Step 4: Bake!
Bake at 400°F (200°C) for 28-34 minutes. The top should be golden brown, crusty, and sound hollow when tapped. Let cool at least 20 minutes before slicing to keep the crumb soft and airy. Enjoy the toasted, sour aroma wafting through your kitchen! For extra crunch, leave the loaf in the oven (turned off, door cracked) for 5 minutes after baking. If you want a super-shiny top, brush with olive oil as soon as the bread comes out. This loaf is best enjoyed the same day but makes excellent toast for days after.
Troubleshooting & Top Tips: Lessons from My Test Kitchen
- Is your dough sticky? This is normal! Discard bread dough is softer and more hydrated than standard loaves. Resist the urge to add a ton more flour, or your loaf may be dense. Use oiled or damp hands for kneading—flour can toughen the dough, but oil keeps it workable and prevents sticking without sacrificing hydration.
- First test fail: My dough was too dry, so it barely rose and turned out brick-like. The fix? Loosen with more water and let the dough rest so the flour fully hydrates before kneading. If your dough looks dry and tears after a few minutes, dribble extra water in by the tablespoon and knead it in until soft and elastic.
- The right rise: Don’t rush the first rise. If the dough isn’t doubled and puffy, give it more time. Cold weather? Set the bowl over a barely warm oven or wrap it in a towel for extra insulation. In very dry climates, drape plastic wrap over your bowl—this prevents the top crust from drying out and improves oven spring (that beautiful rise in the first minutes of baking).
- Crust not browning? Try adding a pan of water to the oven for extra steam, or brush the top lightly with water or olive oil before baking. Steam makes the crust crisp and deepens color. Rotating the loaf halfway through baking also helps ensure even browning, especially if your oven has hot spots.
- Testing done: After five tests, I realized letting the bread cool completely gives the best flavor and crumb. Slice too early, and you risk a gummy, underbaked middle. If you’re in a hurry, let it cool at least 20 minutes—steam escapes, and the texture firms up, making cleaner, easier slices. For extra soft crust, wrap the loaf in a clean towel while cooling; for a crunchier exterior, cool uncovered on a wire rack.
- Swaps that work: I love to add 1/4 cup (25g) toasted seeds, chopped fresh herbs, or shredded cheese—just knead them in at the start of shaping for a twist. Other fun mix-ins: diced olives, caramelized onion, or sun-dried tomatoes. Try cinnamon and raisins for a breakfast variant, or swirl in garlic paste for a savory loaf. Both sweet and savory add-ins adapt beautifully to this forgiving dough.
Variations and Dietary Swaps
- Gluten-free: Swap all-purpose flour for a 1:1 gluten-free blend (with xanthan gum). You’ll get a denser, moist loaf, but it toasts up beautifully for sandwiches. Some bakers use a mix of buckwheat and oat flour for subtle nutty flavor—add 1/2 tsp vinegar or lemon juice to help with structure.
- Dairy-free & Vegan: This base recipe is already dairy-free and egg-free. Just be sure to use olive oil, not butter, for a vegan loaf. If you like a glossy crust, brush with olive oil or a mix of soy milk and maple syrup before baking; it works as an easy egg wash alternative!
- Seeded or Nutty: Fold in pumpkin seeds, sunflower seeds, or walnuts for extra crunch. Allergen note: Bread will contain gluten, and may contain nuts if added as a variation. For an Asian-inspired loaf, try adding black sesame and chopped scallions. Flaxseed, chia, and hemp hearts also work well for nutrition and texture. Toast seeds lightly before mixing in for peak nuttiness.
- Herb & Cheese: Try fresh rosemary, thyme, or green onions. Mix in grated cheddar or crumbled feta for richness—just reduce the salt by 1/4 tsp (1g) if using salty cheese. Adding garlic powder, za’atar, or Italian seasoning can boost flavor. For cheese lovers, a blend of Pecorino and mozzarella is especially melty and aromatic.
- Whole Wheat: Replace up to 1 cup (125g) of the flour with whole wheat or spelt. Add an extra 1-2 tbsp (15-30ml) water, as these grains absorb more moisture. The result is a heartier, more toothsome crumb. For a mild flavor, use white whole wheat, which is less bitter than classic red wheat. Allow a slightly longer rise for the dough to fully hydrate and lift.
Storage, Freezer, and Make Ahead Tips
- Room Temperature: Once fully cooled, wrap the loaf in a clean towel or store in a bread bag for up to 3 days. Avoid plastic wrap, which can soften the crust. If you live in a humid area, store in a paper bag inside a bread box for optimal freshness, or use a linen bag to allow airflow while preventing staling.
- Freezing: For longer storage, slice the bread, then freeze in a zip-top bag for up to 2 months. Toast slices straight from the freezer—no thawing needed. For best flavor, freeze the day you bake. To prevent freezer burn, double-bag or press the slices flat so they don’t clump together. If freezing a whole loaf, wrap securely in foil and place in a freezer bag.
- Reheating: Day-old slices crisp up nicely in a skillet or toaster oven. To refresh a whole loaf, sprinkle with water, wrap in foil, and bake at 350°F (175°C) for 10 minutes. For an ultra-crusty result, unwrap the foil halfway through. If you share with friends or neighbors, reheating gives it that just-baked aroma straight from their own oven!
- Make Ahead: Mix and knead the dough, then refrigerate the bowl overnight. In the morning, allow to come to room temperature, shape, and bake. This slow cold rise deepens the flavor and fits busy schedules! If you need more flexibility, shaped loaves can rest in the fridge up to 18 hours and be baked straight from cold (just add 3-5 minutes to bake time and check for doneness).
Printable Recipe Card: Sourdough Discard Bread
Prep Time: 20 minutes
Cook Time: 30 minutes
Total Time: 2 hours 10 minutes
Yield: 1 loaf (10-12 slices)
Allergens: Contains gluten. Vegan and dairy free if made with oil (see tips above).
Ingredients
- 3 cups (375g) all-purpose flour
- 1 cup (240g) sourdough discard
- 3/4 cup (180ml) warm water
- 2 tsp (7g) instant yeast
- 2 tsp (10g) fine sea salt
- 1 tbsp (12g) sugar (optional)
- 2 tbsp (26g) olive oil
Instructions
- In a large bowl, whisk flour, yeast, salt, and sugar. Stir in discard, water, and oil. Mix until a sticky dough forms. Rest 10-15 minutes.
- Knead by hand or with a mixer for 5-7 minutes, until soft and elastic. Shape into a ball. Coat bowl lightly with oil, cover, and let rise 60-90 minutes until doubled.
- Turn dough onto a floured surface and gently shape into a loaf or oval. Place in greased loaf pan or on tray. Let rise 30-45 minutes, until puffy. For a softer crust, cover with a damp towel during the second rise. If adding mix-ins, sprinkle them on the dough before shaping.
- Bake at 400°F (200°C) for 28-34 minutes, until golden brown and hollow-sounding. Cool 20 minutes before slicing. Loaf can also be finished under the broiler for a minute for extra browning, but watch closely to prevent burning.
Nutrition Estimate (per slice, 12 slices)
- Calories: 115
- Fat: 2g
- Carbohydrates: 21g
- Protein: 3g
- Sodium: 220mg
A Warm Invitation from My Kitchen to Yours
Baking this sourdough discard bread is my go-to comfort ritual—simple, thrifty, and deeply satisfying. It’s the kind of homemade loaf that turns leftover starter into something golden, nourishing, and worth sharing. If you bake it, I’d love to see your results! Tag Spice Thrive or leave a comment below. For more comforting, classic breads and Asian-inspired bakes, browse my other recipes. Thanks for baking along—let’s keep our kitchens growing, one loaf at a time.
Sourdough Discard Bread FAQ
Can I use discard that’s a few weeks old?
As long as there’s no mold, pink streaks, or strong foul odor, discard that is old works fine. Stir well and use as directed.
Is this bread sour?
It’s pleasantly tangy, not overly sour. Older discard adds more zing, but the loaf is mild enough for sweet or savory toppings.
Can I double this recipe?
Yes! Double all ingredients and divide the dough between two pans. Increase bake time by 3-5 minutes if needed.
My bread didn’t rise – now what?
Check that your yeast is fresh and water is warm (not hot). Allow the dough more time to rise if your kitchen is cool.
Can I use active sourdough starter (not discard)?
You can, but for rising speed and reliability, I recommend using discard plus added yeast as in this recipe.
Is this vegan?
Yes, if you skip butter and stick to olive or neutral oil—no dairy or eggs required.
This article was created with the help of AI. Images may also be AI-generated.